Connect WhatsApp Bots
Subscriber Manager
Whatsapp Template
Live Chat
Step-by-Step Guide to Create a WhatsApp Template in WhatBuddy.io
Creating a WhatsApp template in WhatBuddy.io involves a series of steps to ensure your template is set up correctly and approved for use. Below is a comprehensive guide to help you through the process:
1. Once logged in, locate the sidebar menu on the left side of the dashboard.
2. Click on Whatsapp Templates to open the templates management section. click on Create New Template
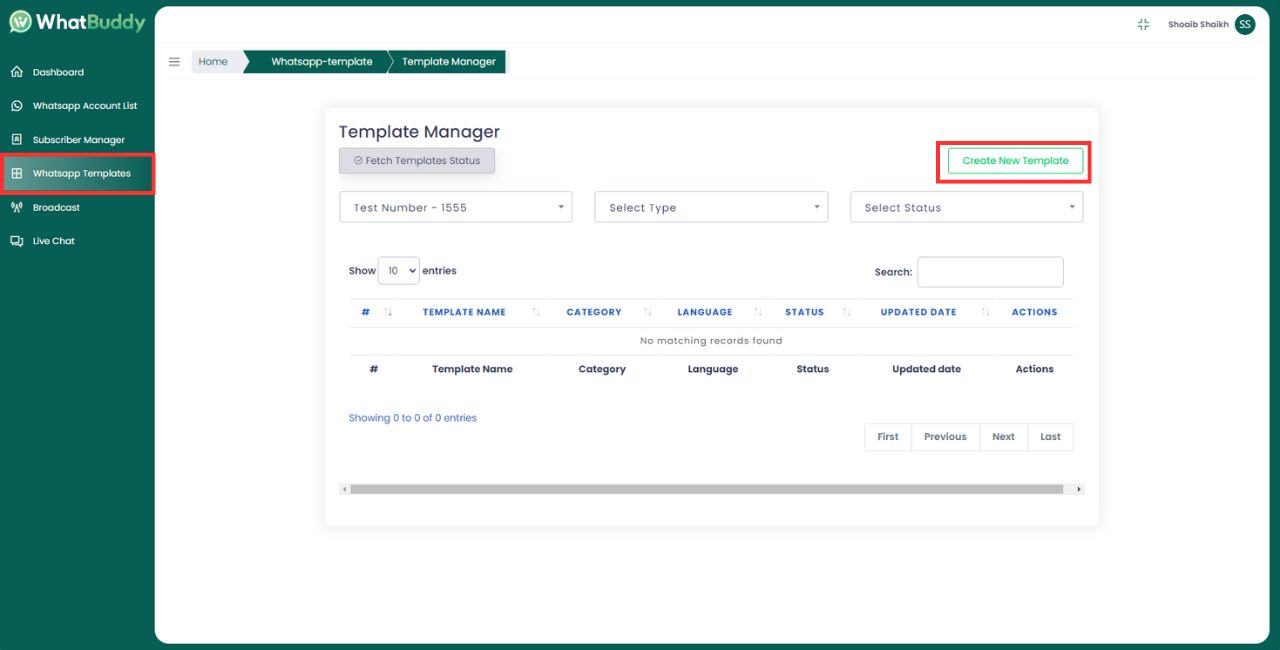
1. In the Templates section, after clicking on the Create New Template button.
2. A new form will appear where you can enter the details for your template.
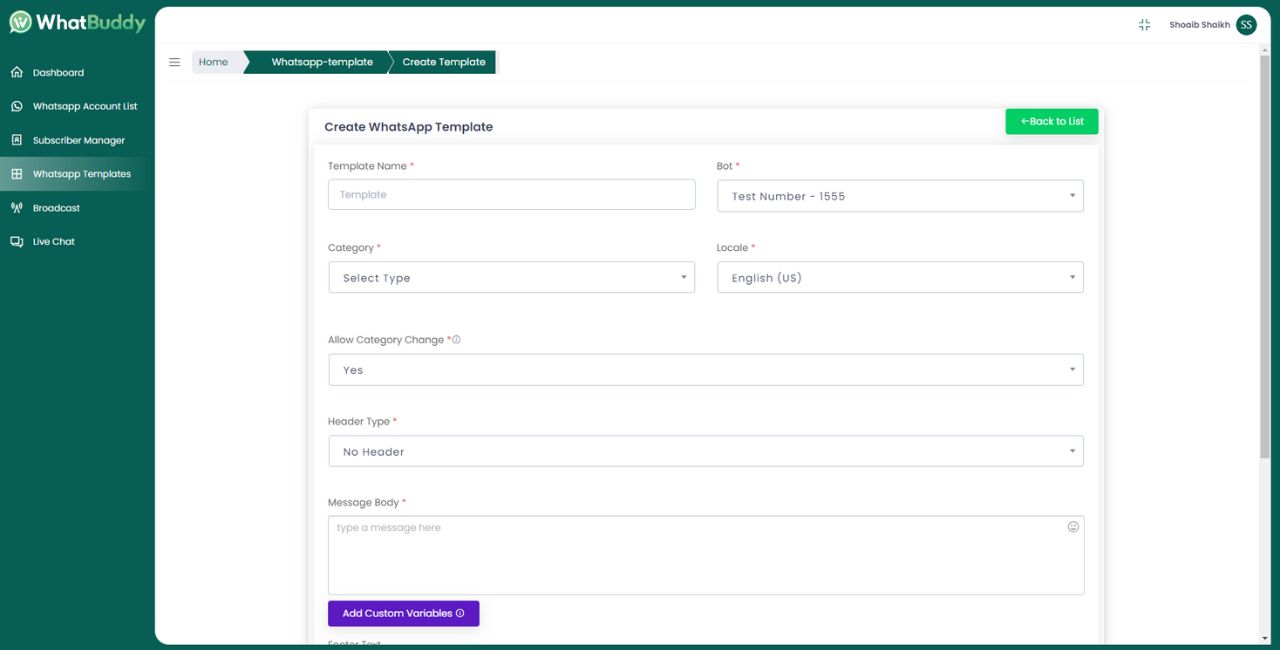
1. Template Name: Enter a unique name for your template. This name should help you identify the template easily.
2. Category: Select the appropriate category for your template from the dropdown menu. Categories might include Transactional, Marketing, or OTP, depending on your use case.
3. Language(Locale): Choose the language in which your template will be sent.
4. Header: If your template requires a header, you can add one here. The header can be text, an image, a video, or a document.
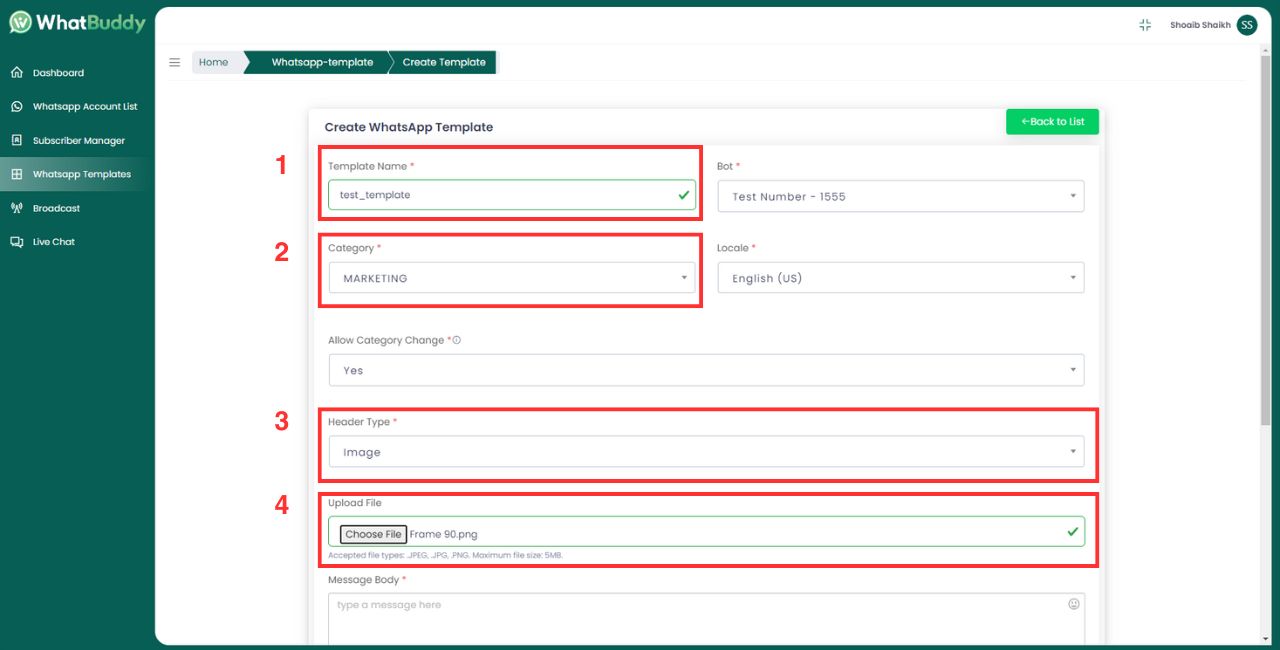
5. Body: Write the main content of your message in this section. You can use placeholders (e.g., {{1}}, {{2}}) for dynamic content.
6. Footer (Optional): Add a footer to your template if needed. This is usually used for disclaimers or additional information.
Before submitting your template for approval, it’s a good idea to preview it to ensure everything looks correct.
1. Once you’re satisfied with your template, click on the Submit button.
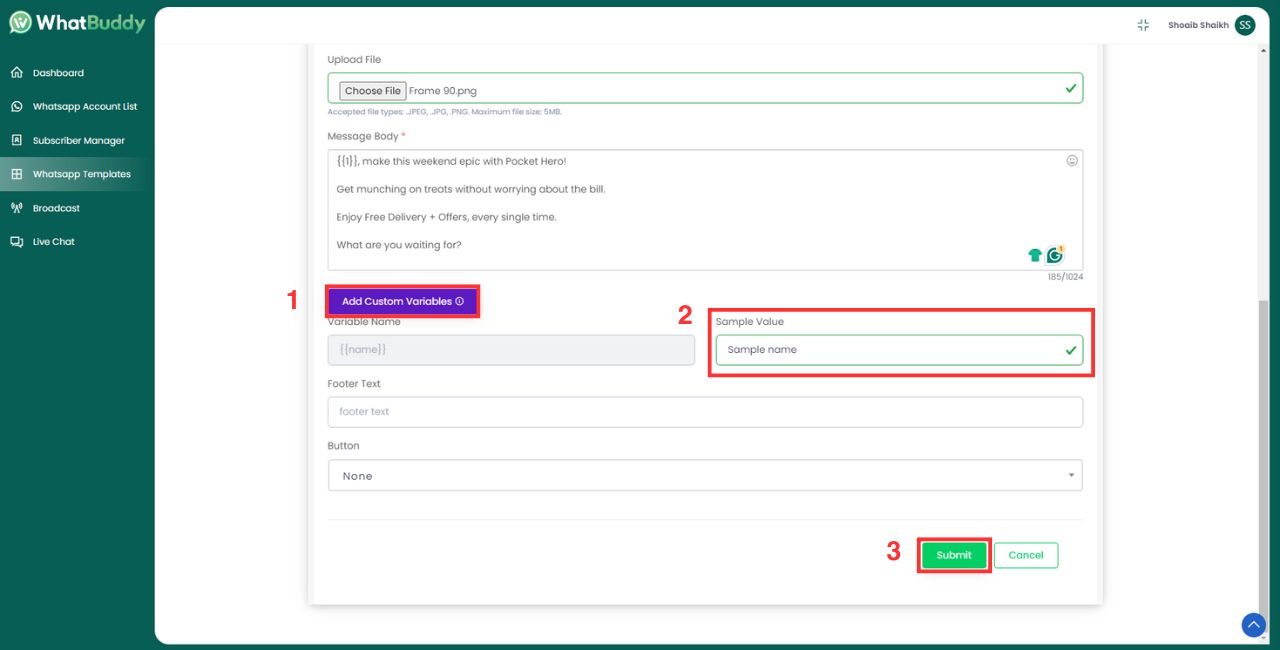
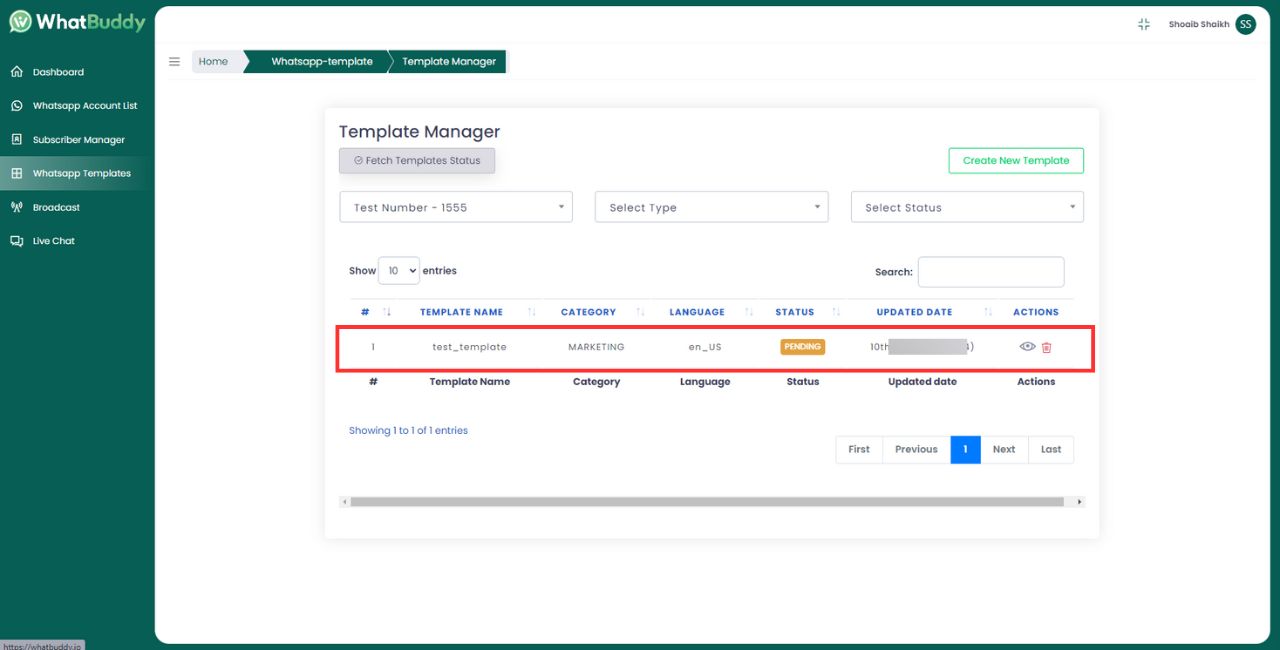
After submission, you can check the status of your template in the Templates List section.
1. The status will be displayed next to each template name (e.g., Pending, Approved, Rejected).
1. Once your template is approved, you can start using it in your WhatsApp campaigns.