Connect WhatsApp Bots
Subscriber Manager
Whatsapp Template
Live Chat
Follow these steps to efficiently manage and categorize your subscribers using labels in WhatBuddy.
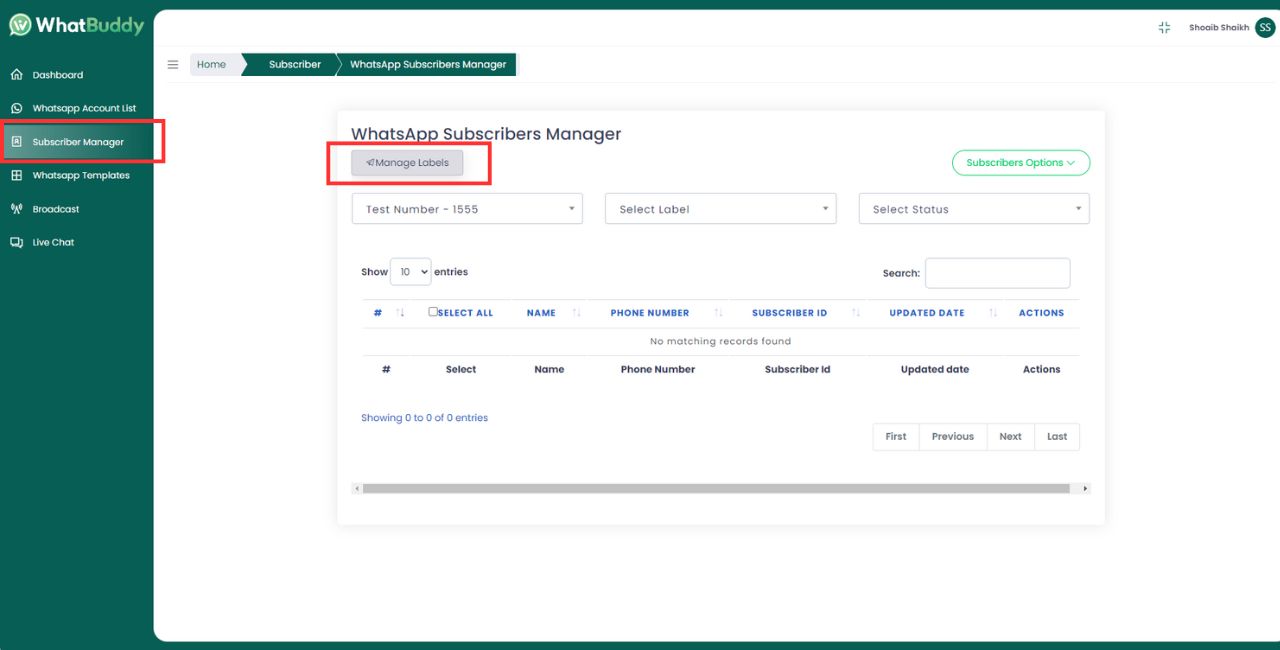
1. From your dashboard, locate and click on the Subscribers Manager tab in the Sidebar menu.
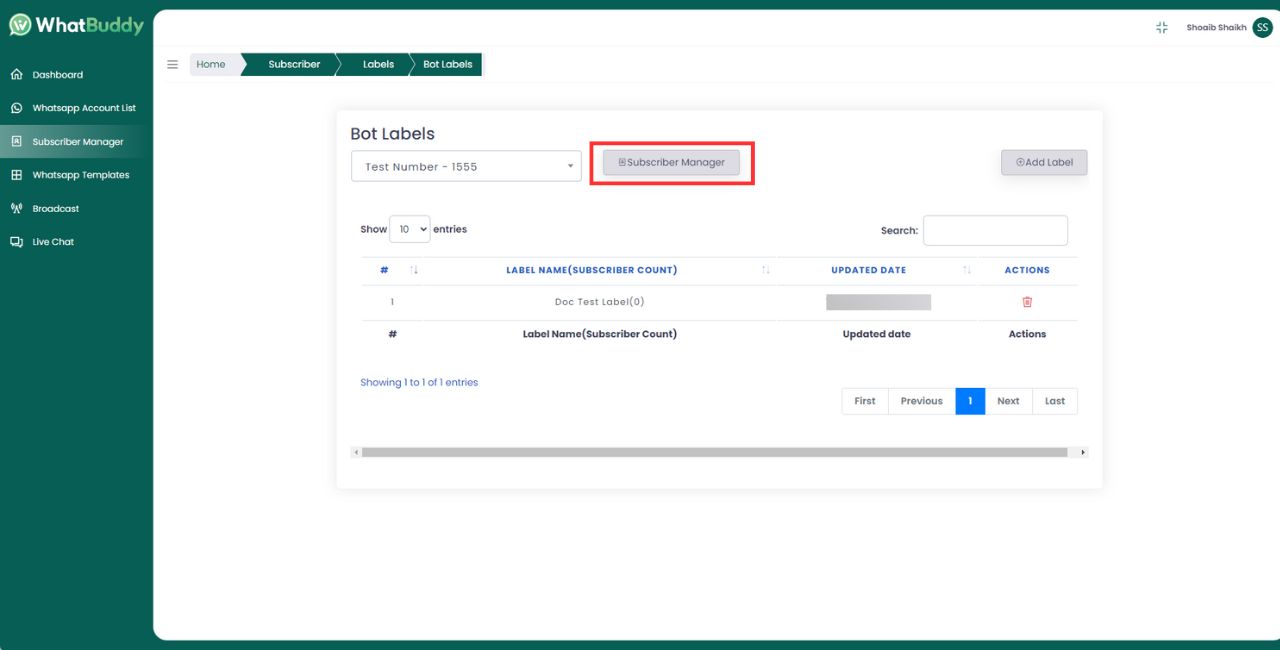
2. Click Manage Labels from Page.
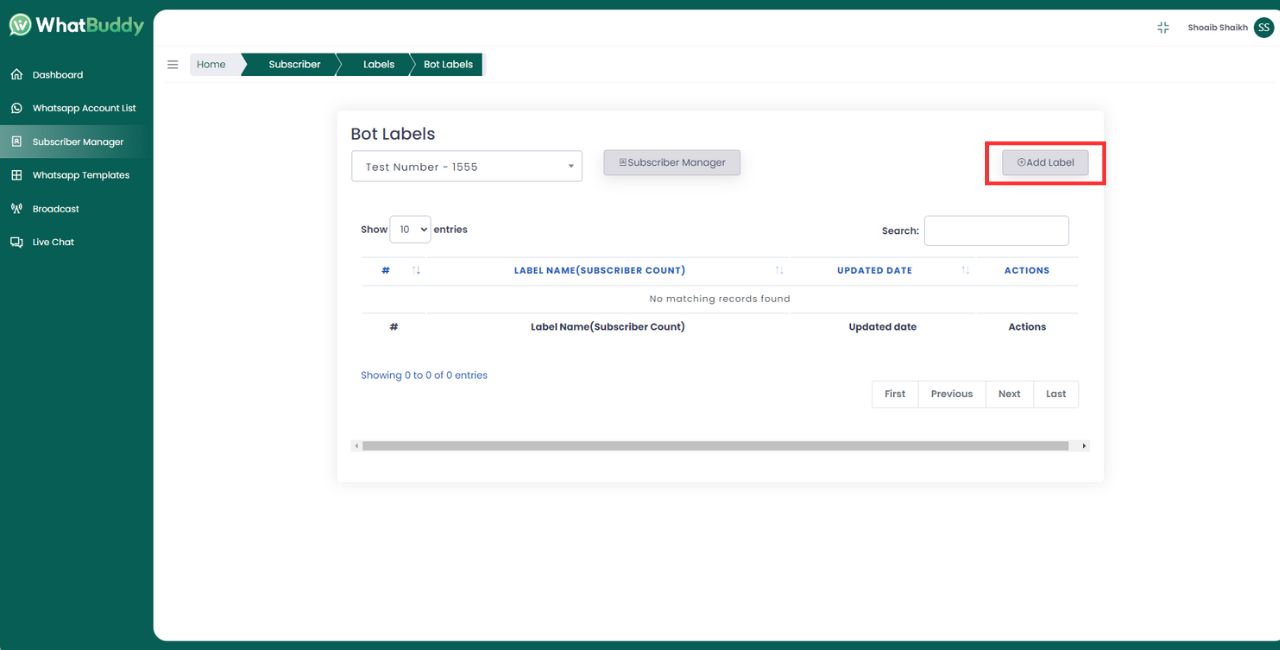
3. A List of Labels will appear if labels are already added (Existing labels and count of subscriber are shown).
1. Click on the Add Label button.
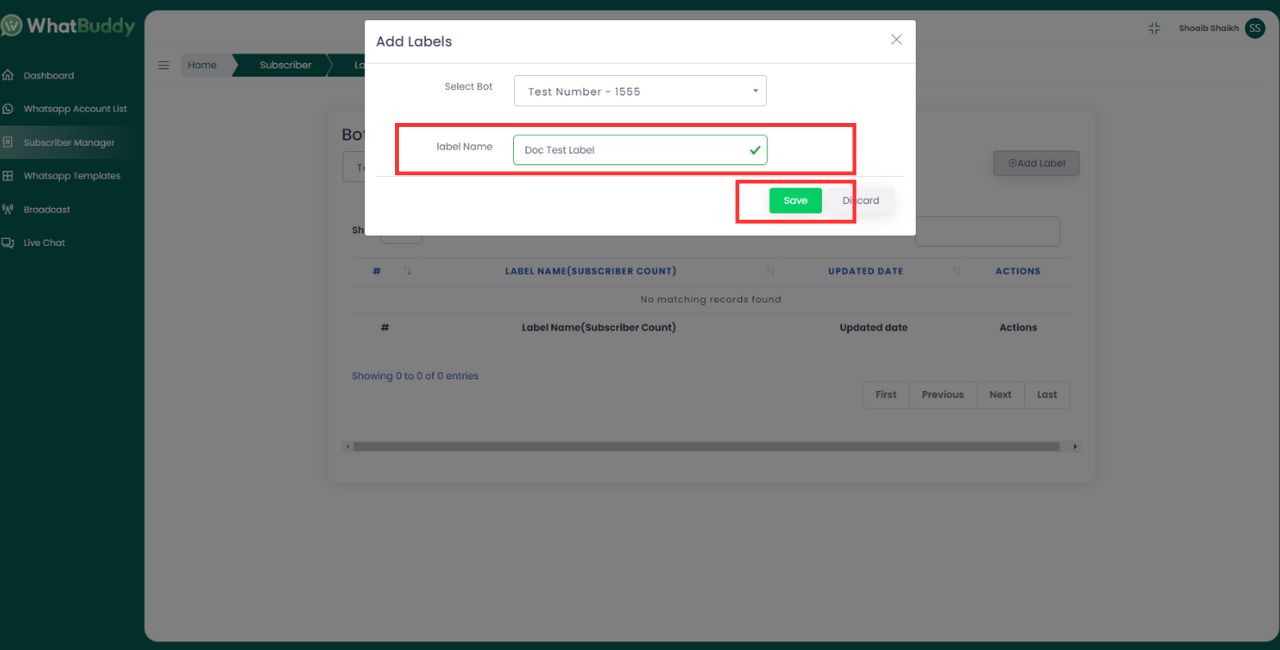
2. Add Label Form will open.
3. Select the Bot on which labels is to be created.
4. Enter a Label Name in the provided field.
5. Click on Save to create the label.
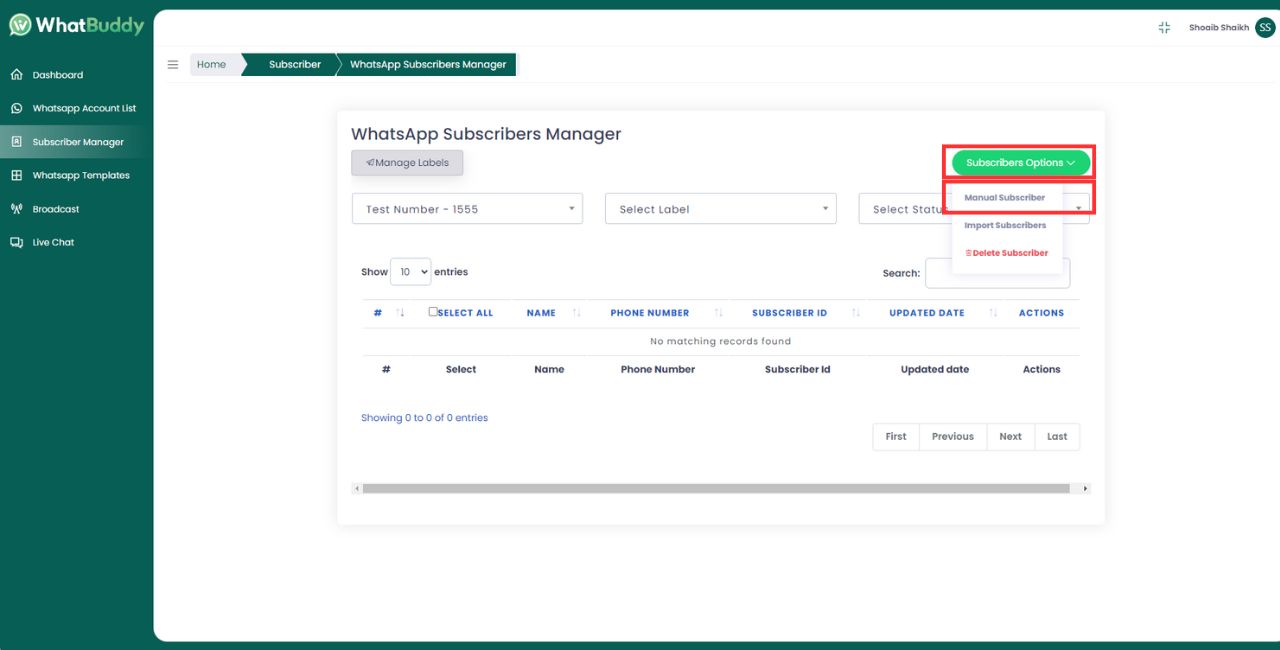
1. click on the Subscribers Manager.
1. First click on Subscribers Option dropdown button, then click on Manual Subscriber
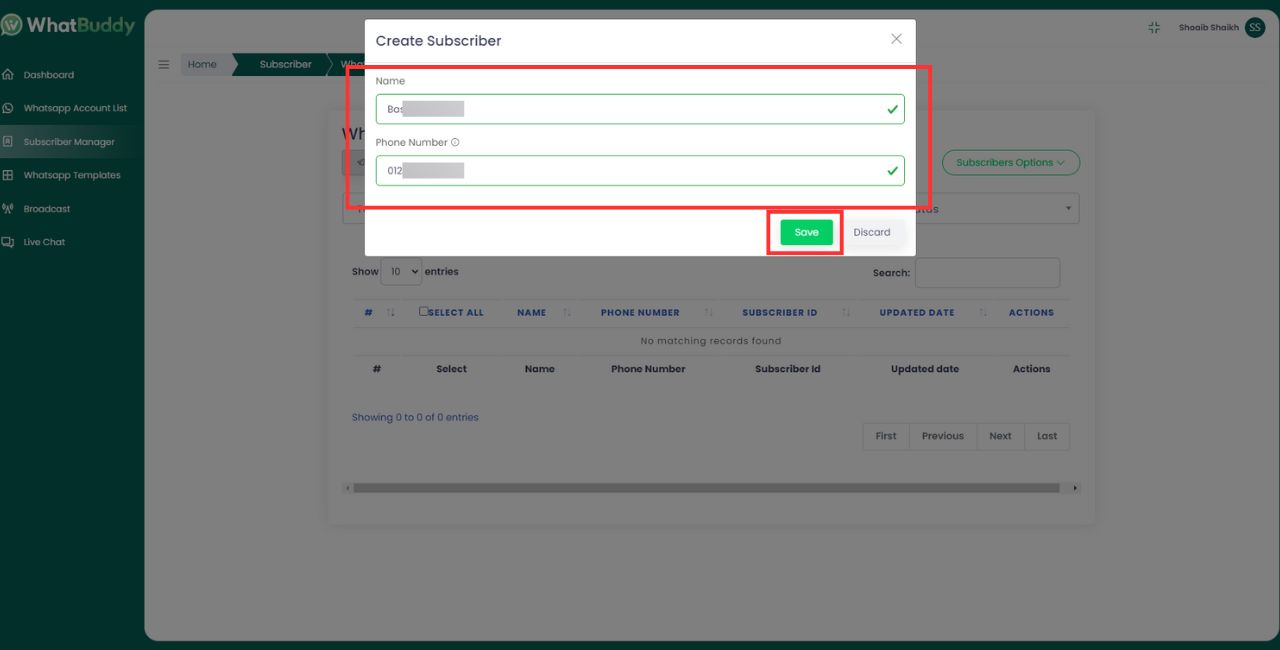
2. Enter Subscriber Name
3. Enter subscriber mobile number along with the country code and WITHOUT (+) Plus Sign.
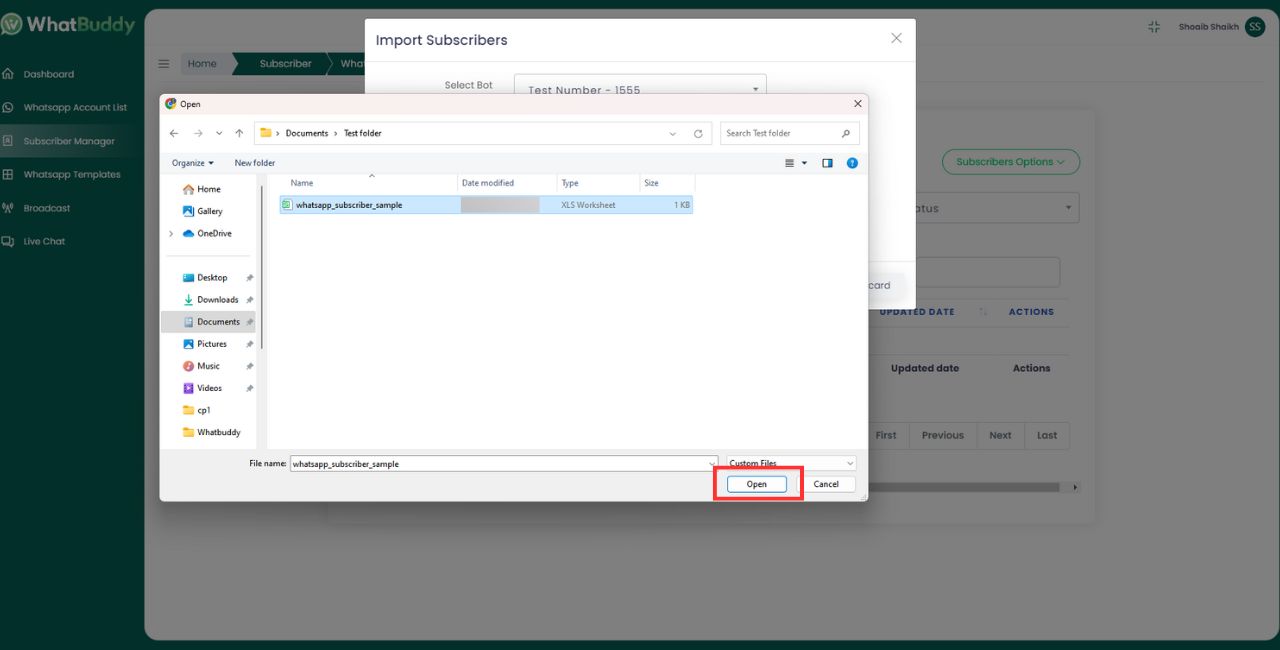
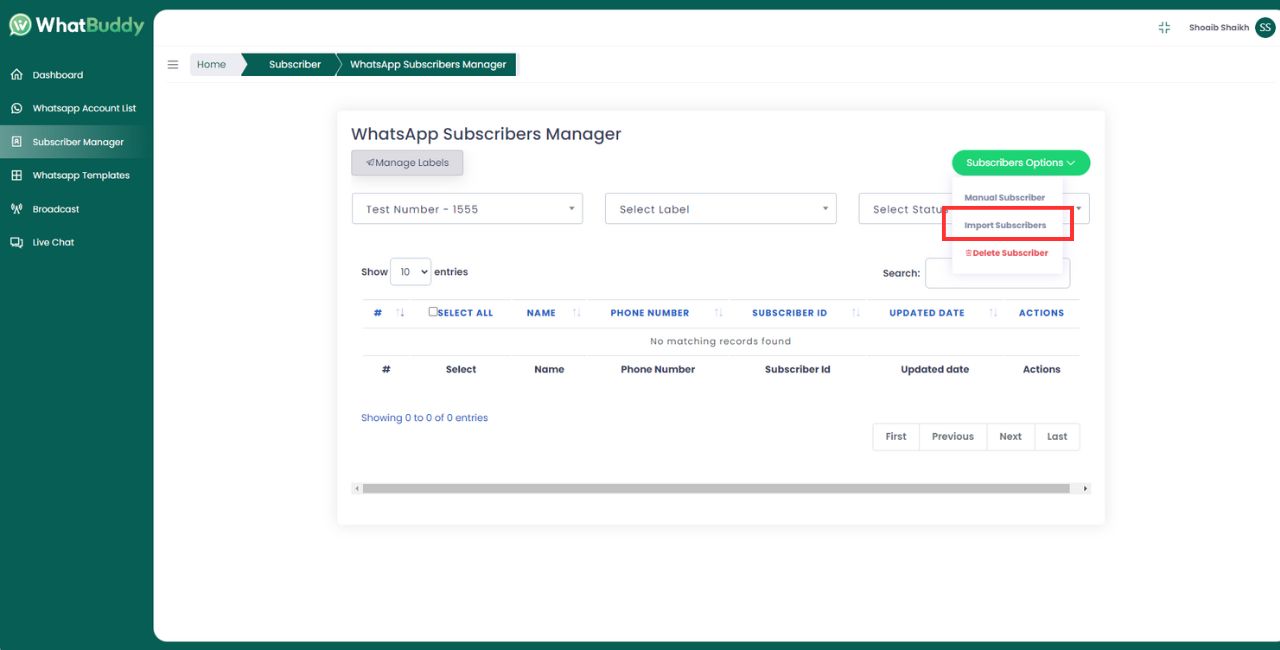
1. If we want to import Subscriber in Bulk we can import using these feature.
2. Click on Import subscribers.
3. Import Subscriber form will open.
4. From the drop down select the Bot to which Subscribers need to be imported.
5. Select the Label in which the subscriber need to be added. (Optional).
6. Select the bulk CSV file from which the subscriber need to be imported.
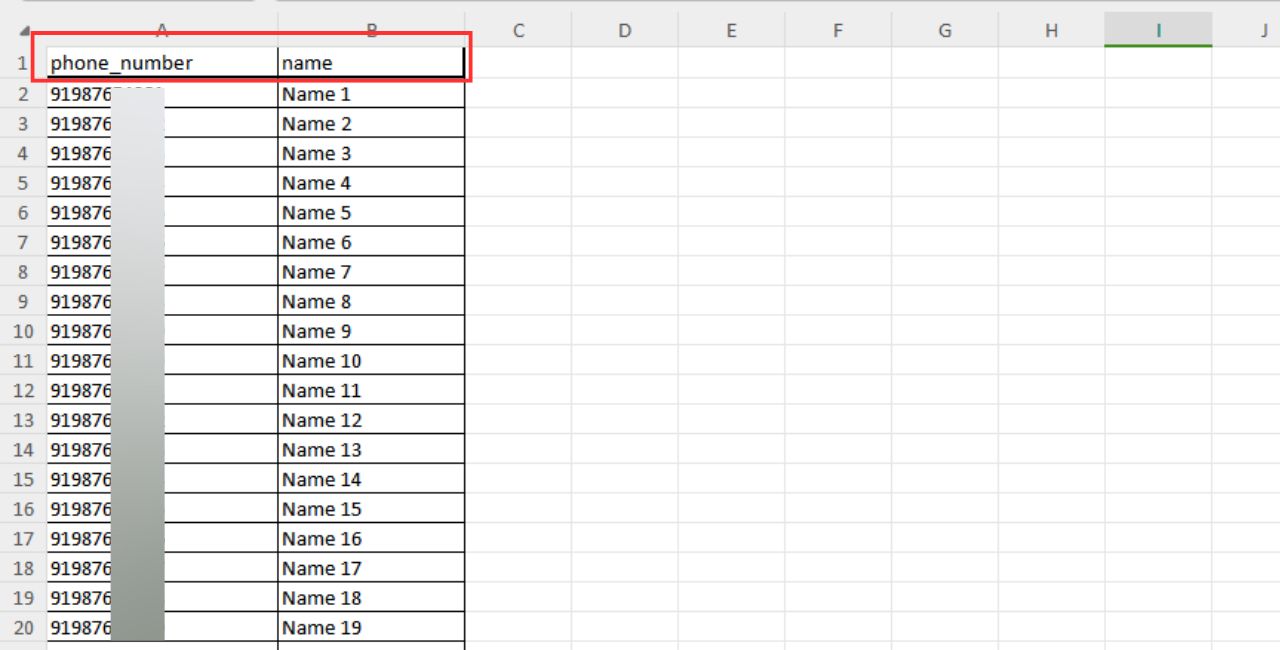
7. Sample CSV file is provided for reference on the columns to for mobile number and name fields.
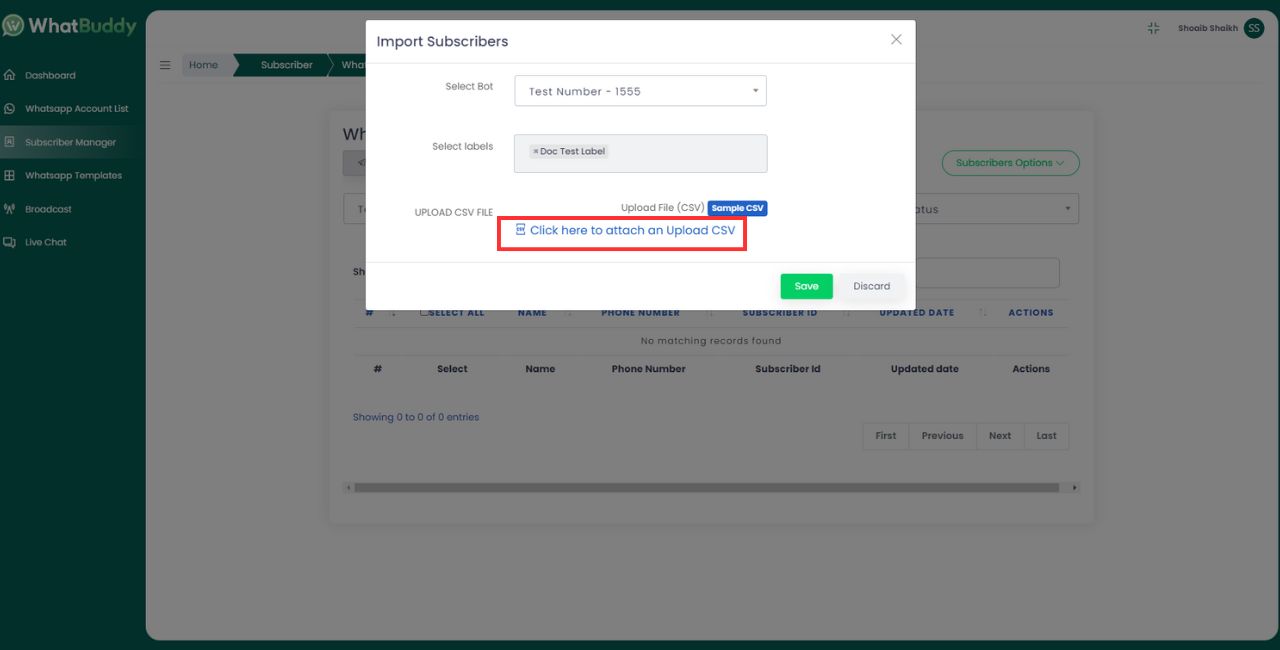
8. The first column of the CSV should contain subscriber phone_number and second column should be subscriber name.
9. After CSV file is selected
10. Then click save to save the subscriber.