Connect WhatsApp Bots
Subscriber Manager
Whatsapp Template
Live Chat
Follow the simple steps given below to seamlessly connect your WhatsApp Business account to WhatBuddy and revolutionize your customer communication experience.
1. First you need create Meta App. Go to https://developers.facebook.com/
If you have not logged, click in menu Log in
2. Click My Apps

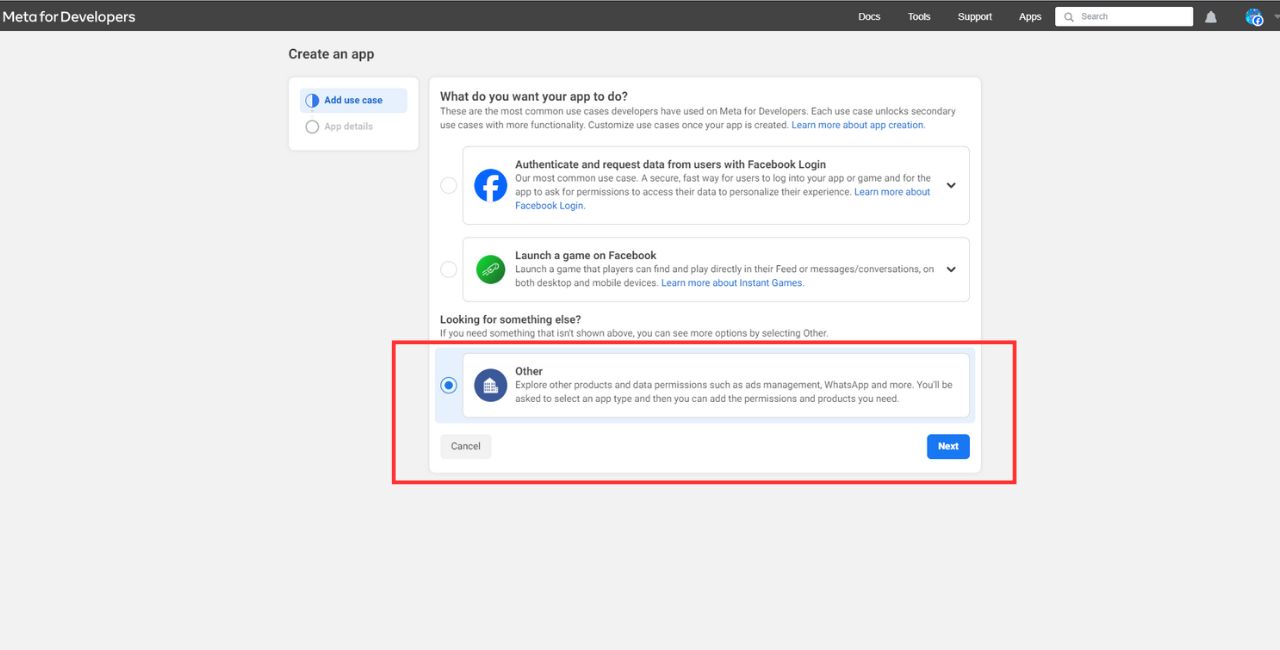
3. Click Create App

4. Select use case Other and Click Next
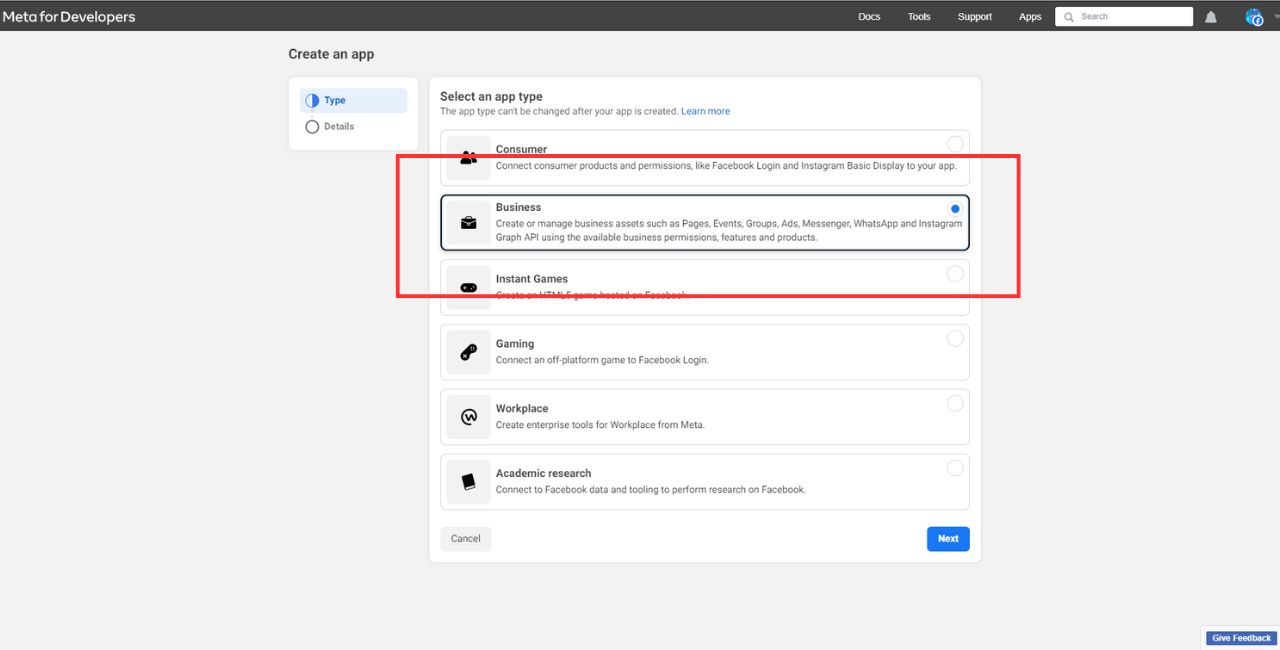
5. Select an app type Business and click next
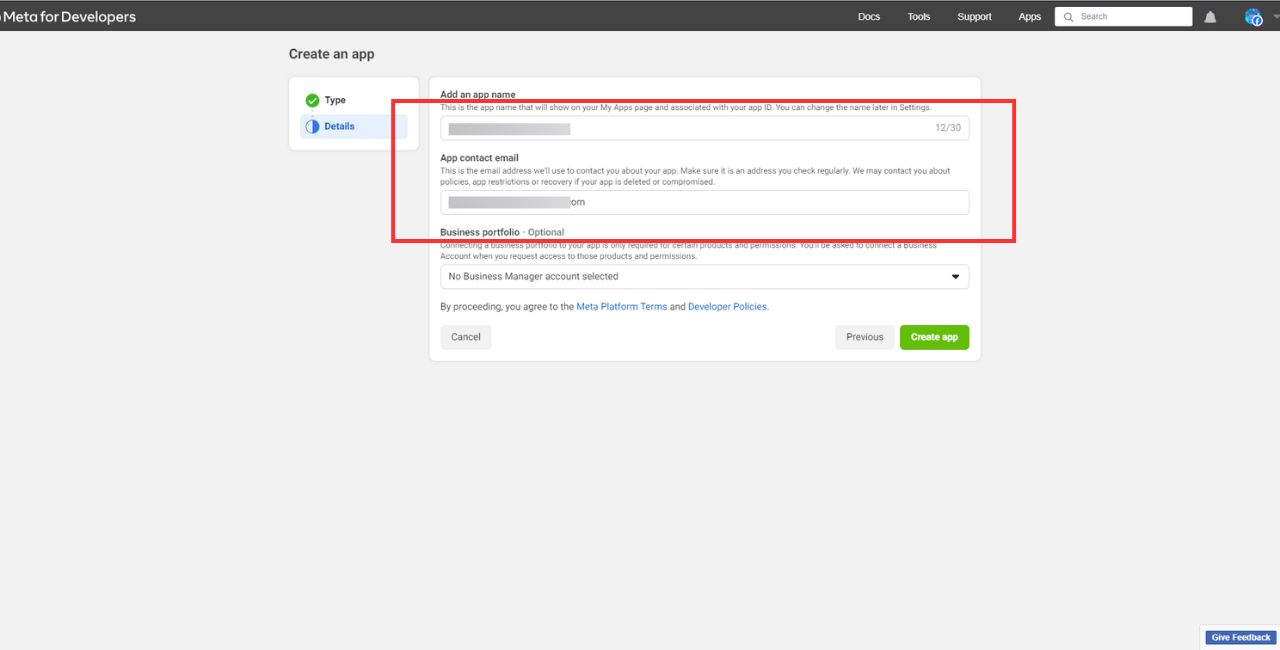
6. Fill fields app name, contact email - what you want. In the Business Account field, you can select a Business account. Anyway, the field is optional at this stage.
7. Add product to your app find WhatsApp and click set up
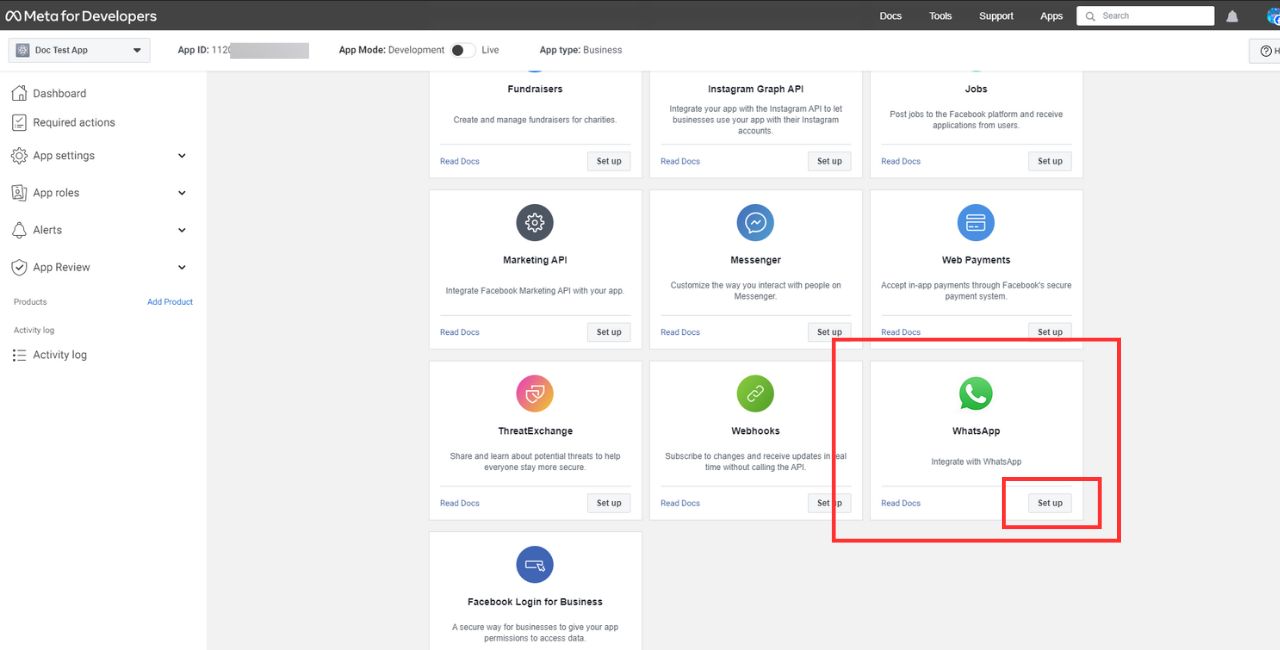
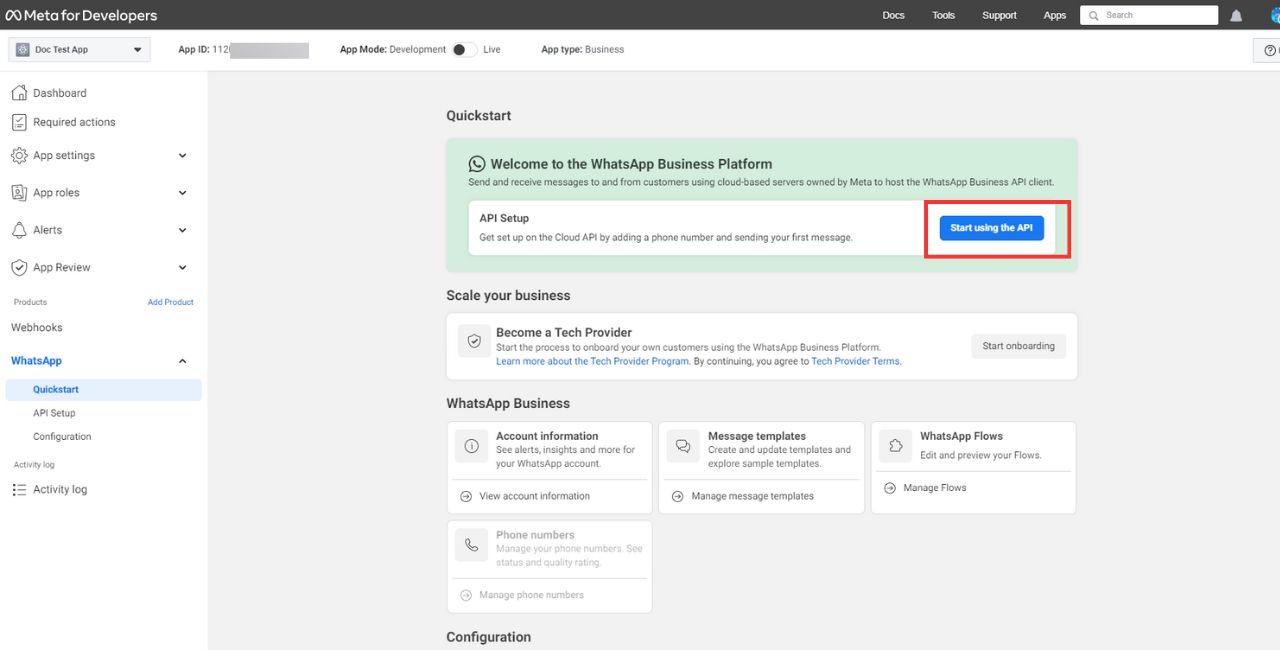
8. After clicking on the “Set up” button a page will appear for next steps. click Start using the API
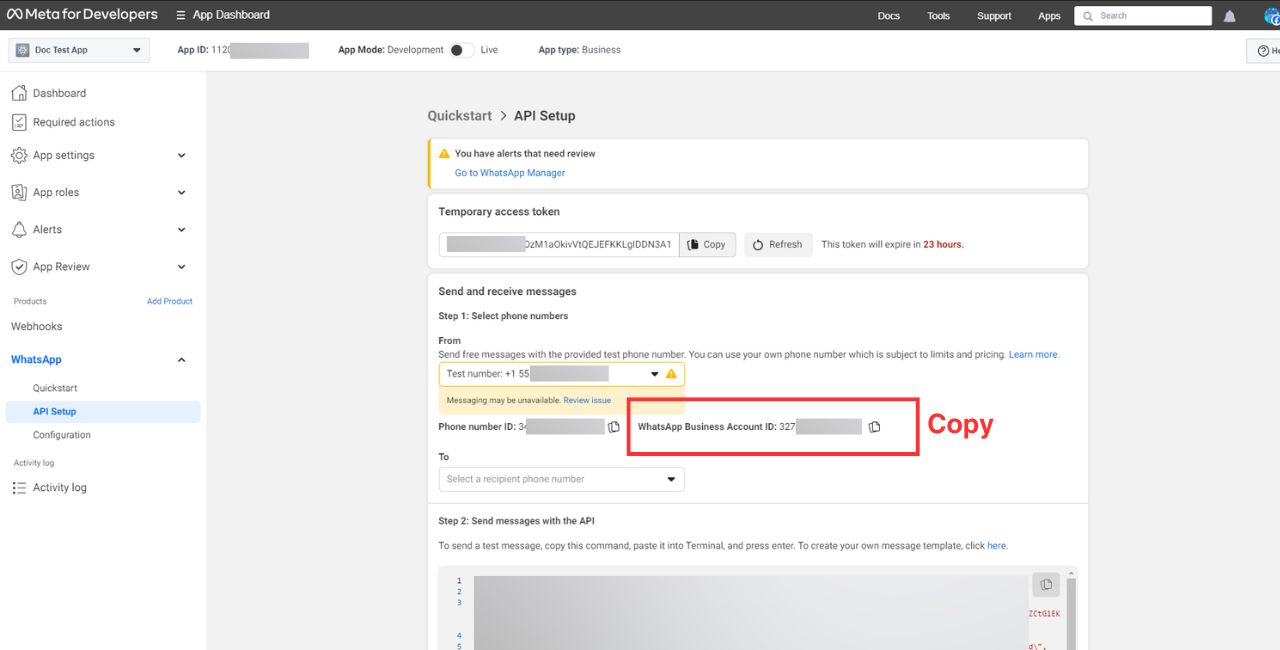
9. You have now WhatsApp Business Account ID. Copy it to our app into BUSINESS ACCOUNT ID (Next steps to Paste this ID in WhatBuddy). Don't close this page.
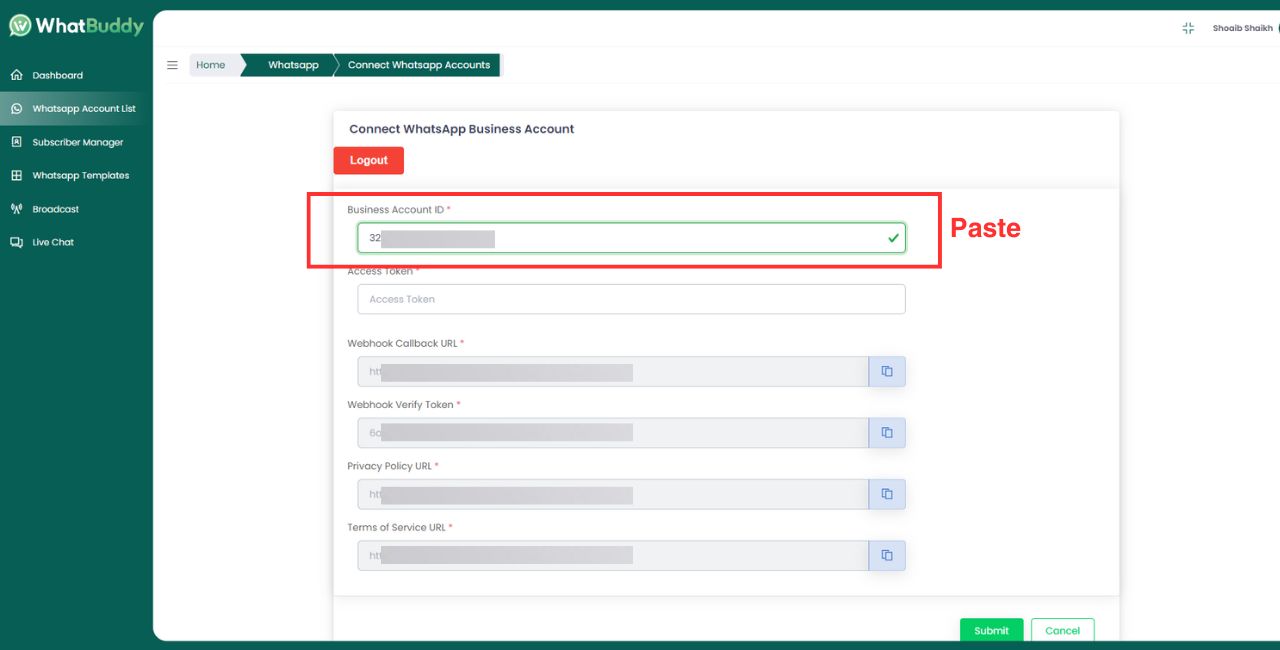
10. After clicking on Whatsapp Account List in WhatBuddy. click on Connect Account button
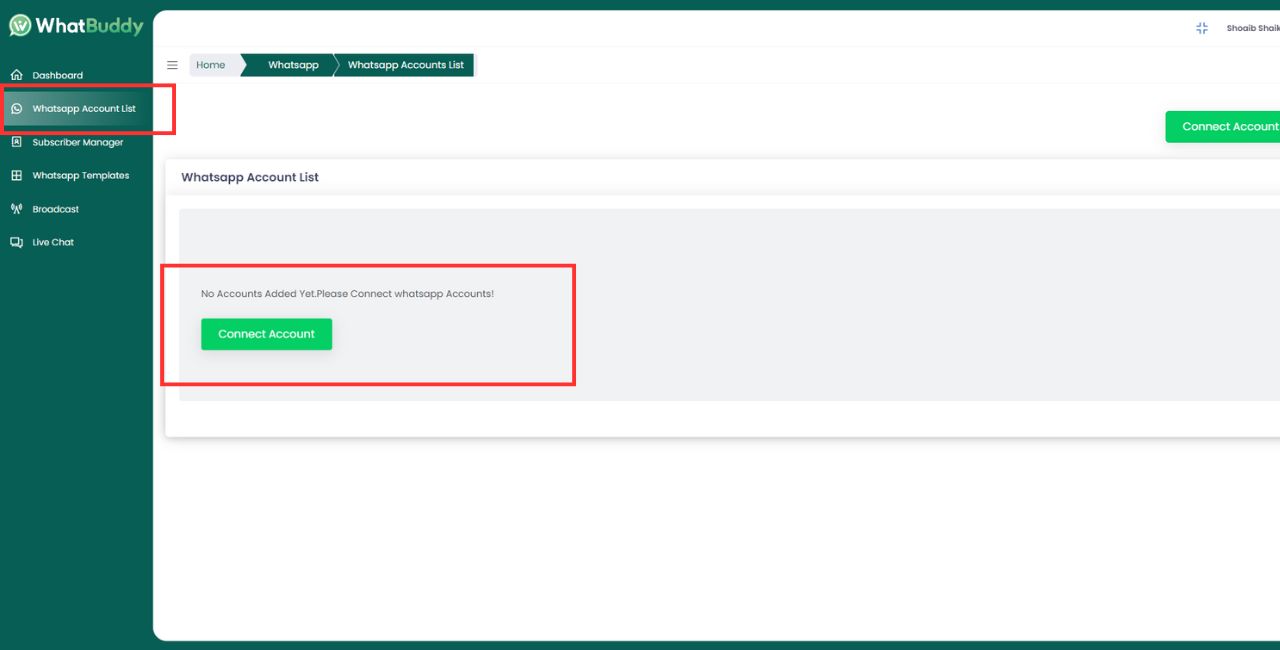
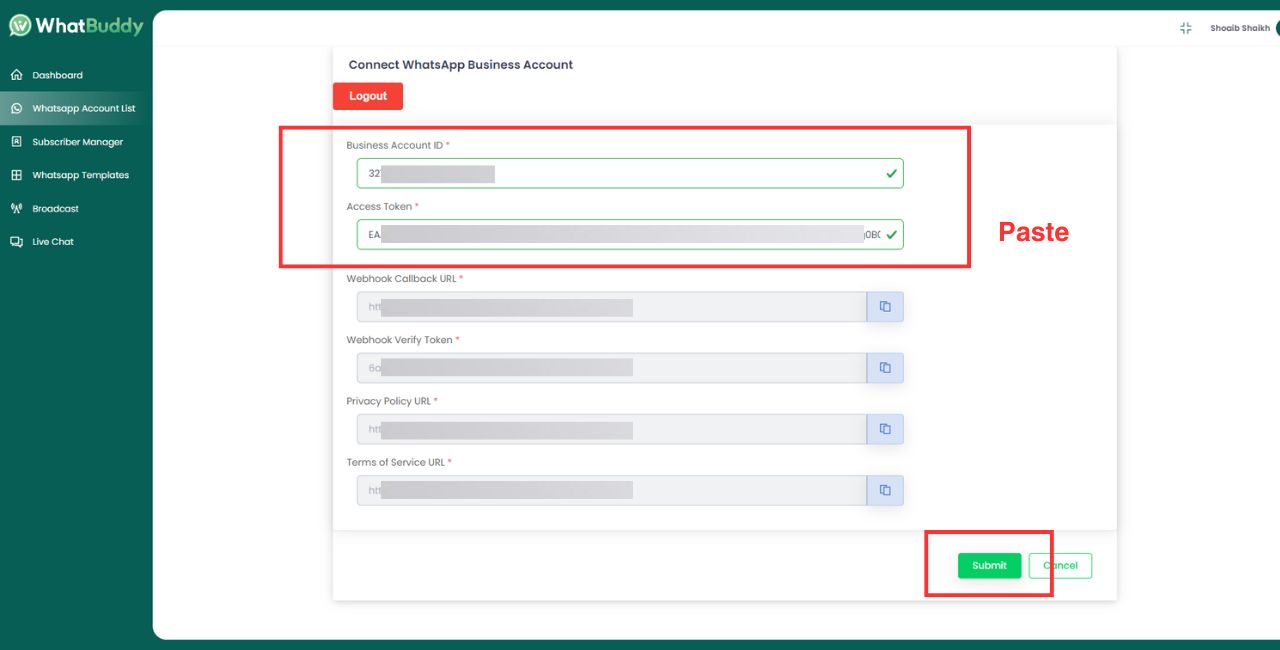
11. Paste the WhatsApp Business Account ID in the first field
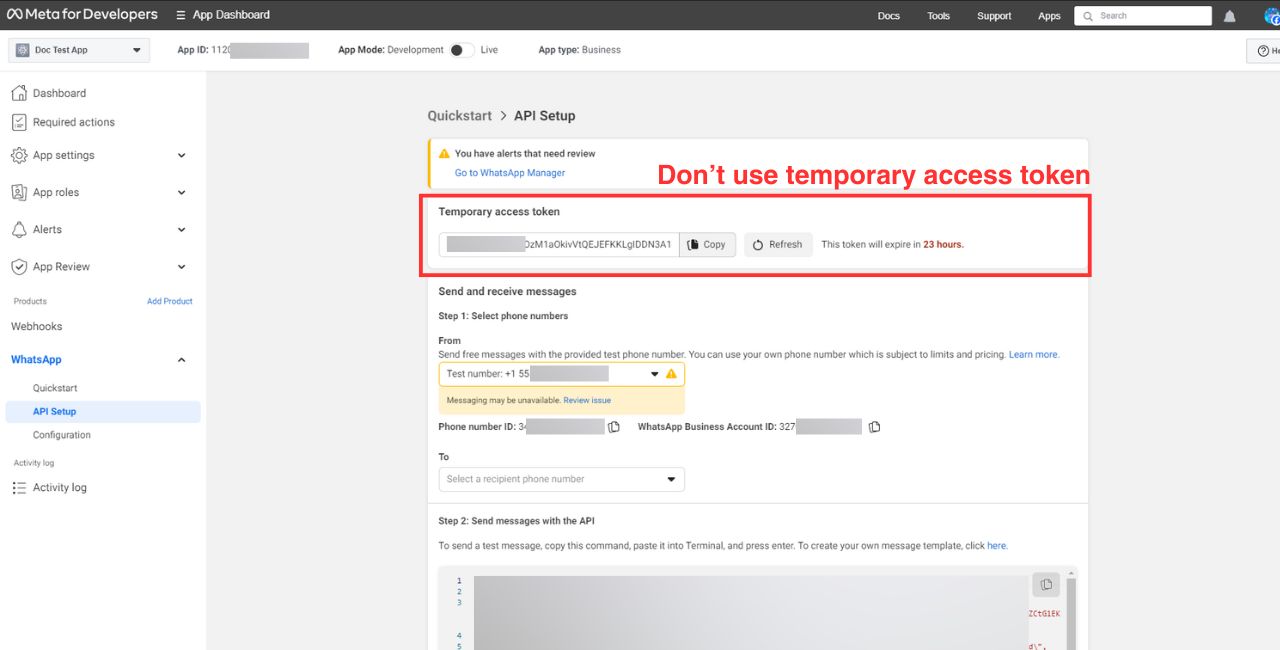
12. Don't use temporary access token. You have to collect a permanent access token to connect your bot.
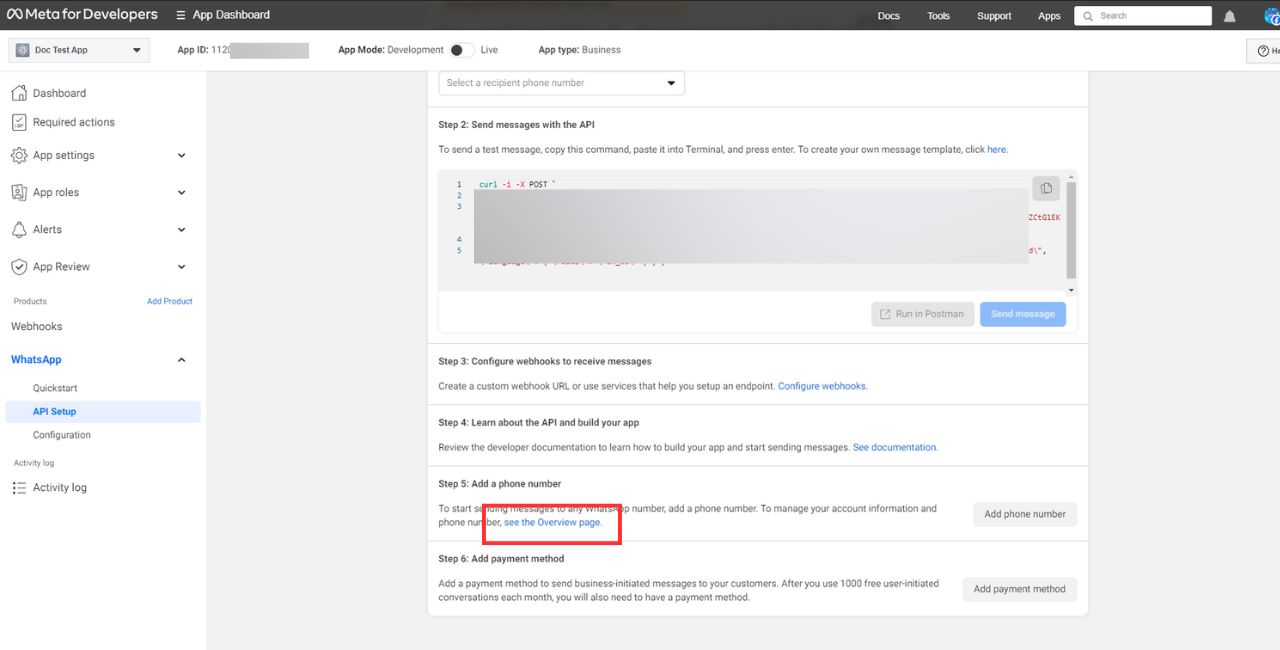
1. click on the see the overview page button. or you can visit on https://business.facebook.com/ for business settings
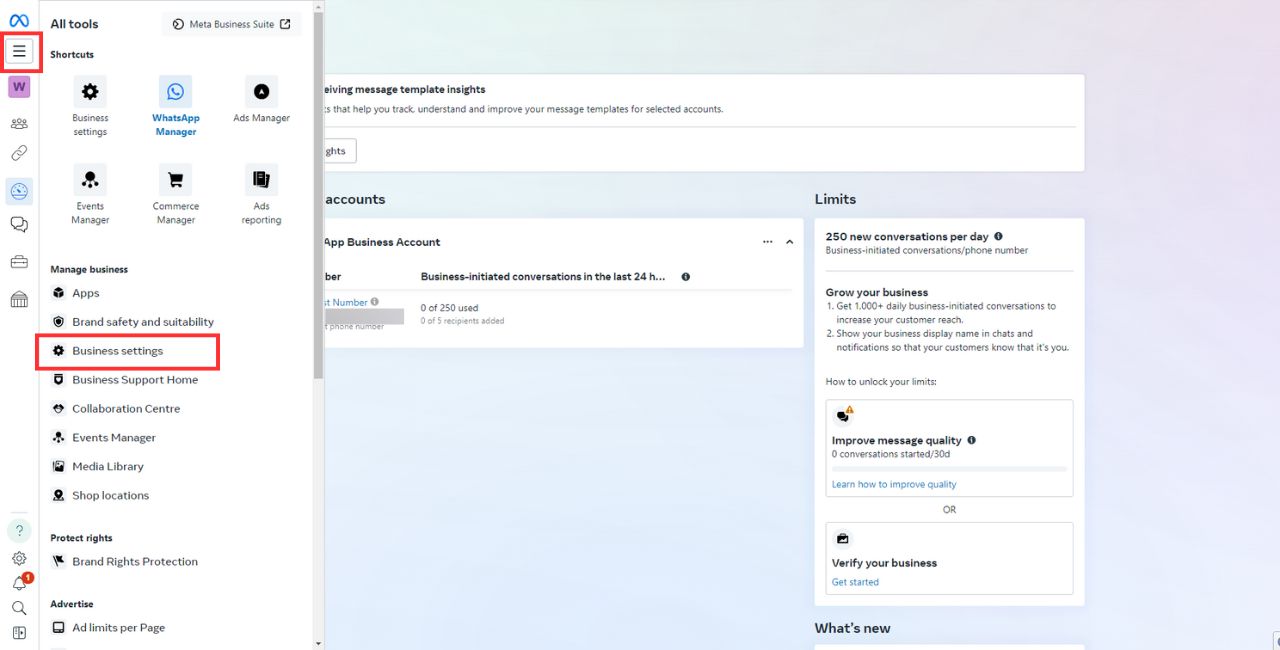
2. On the overview page, click on the menu button and the left sidebar will be expanded with all tools. Now click on the Business Settings.
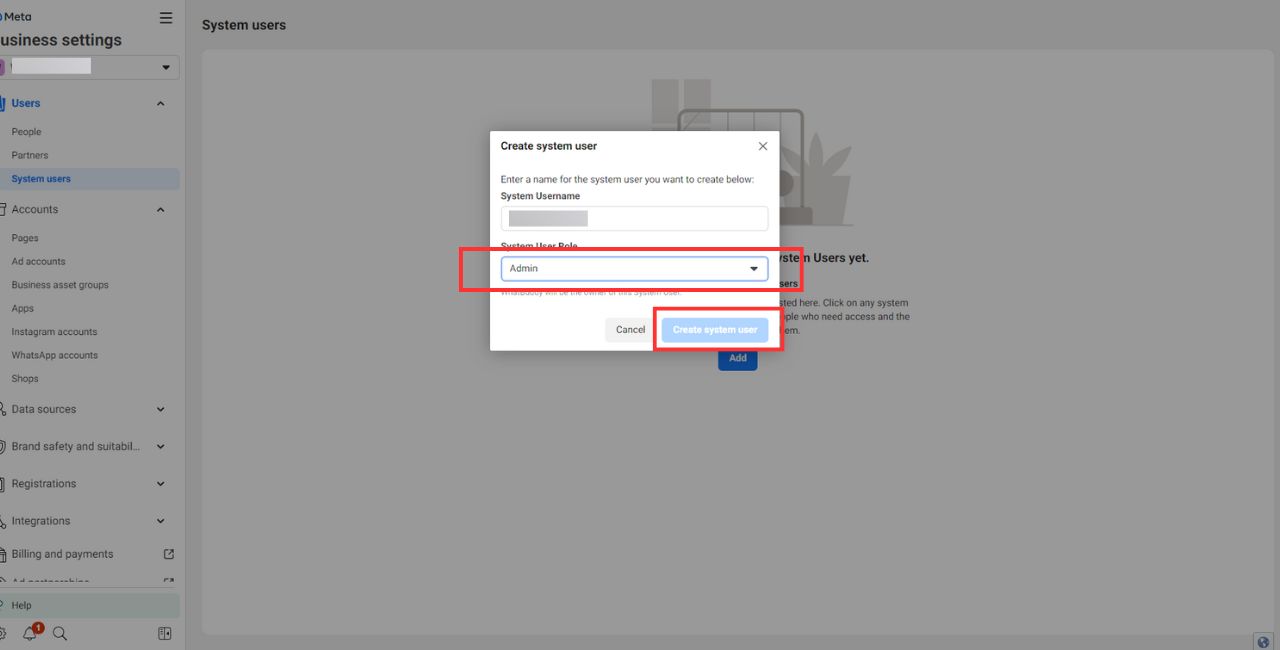
3. First, you have to select System user in the left sidebar of the business setting page. Now you have to add user by clicking on the add button.

4. In the system user name field, give a user name, and in the system user role field, select a role employee or admin.
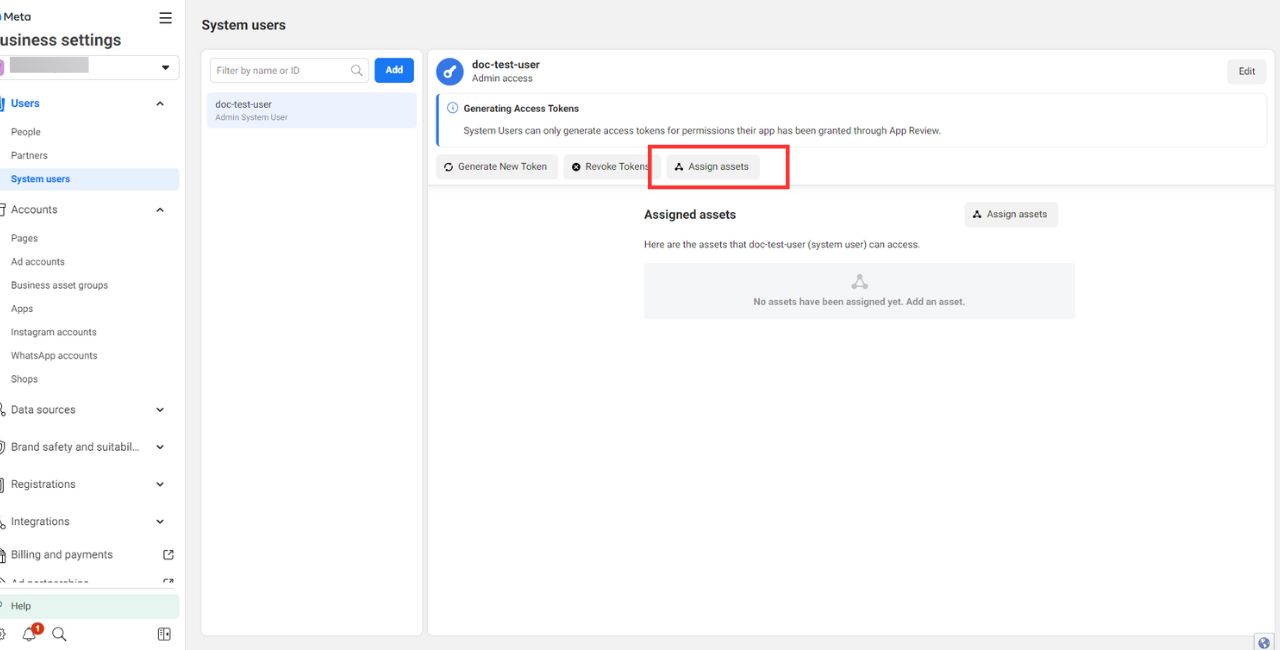
5. Select a user and click on the Add Assets button.
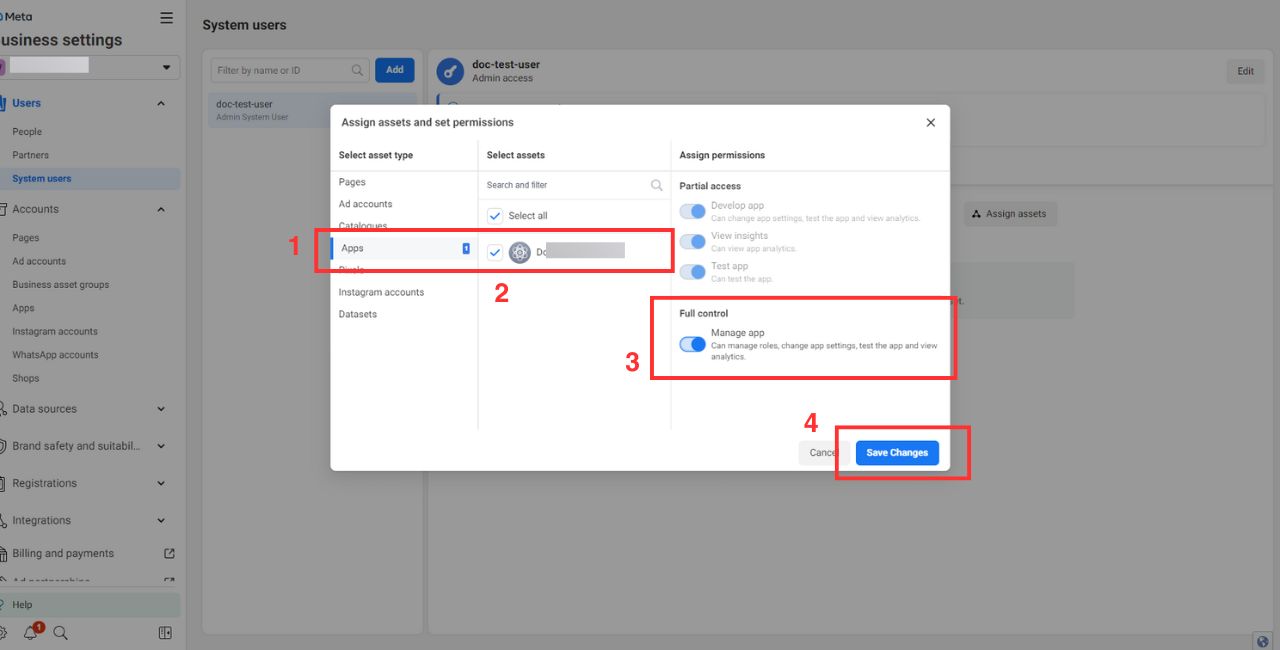
6. Select the Apps menu. Now select the app to which you want to assign assets. Then give permission. Here I permit Full control by enabling the radio button of the Full control option. Now click on the Save
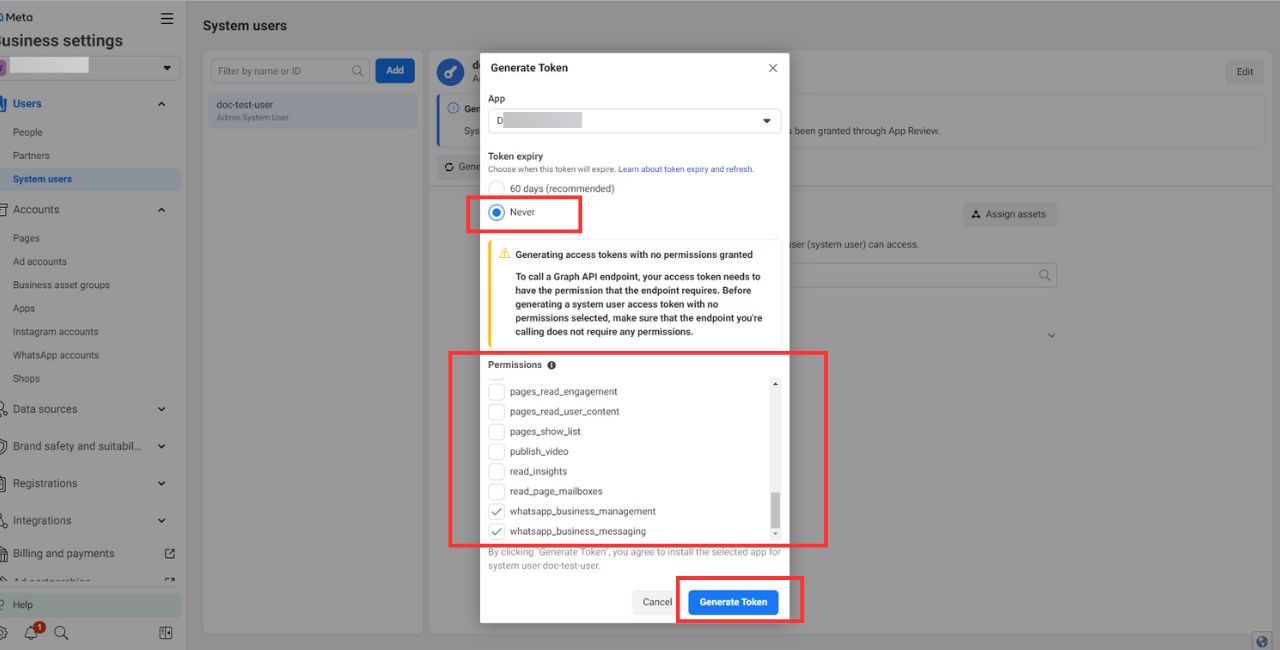
7. To generate an access token for the user click on the Generate new token button.

8. Select your App and select permissions. You have to select Business_management, Catalog_management, WhatsApp_business_messaging, and WhatsApp_business_management. Then click Generate Token
9. Modal will appear with an access token. Now copy and save the access token. or click on access token to copy
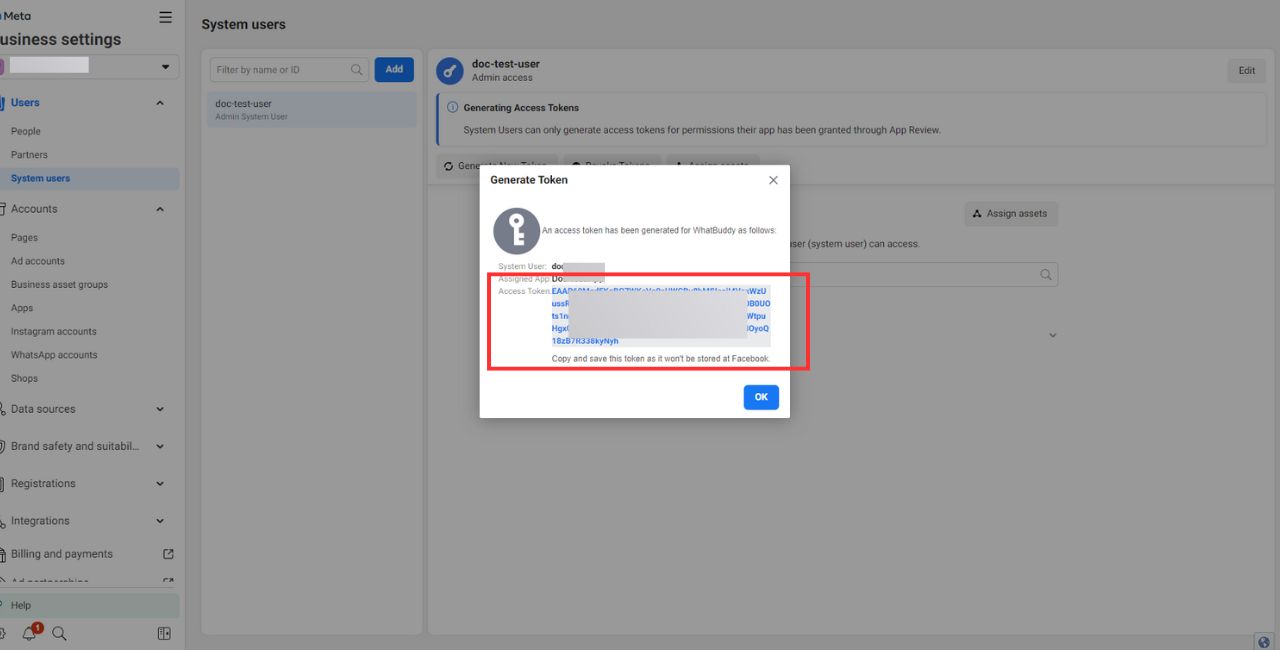
10. Now copy the access token.
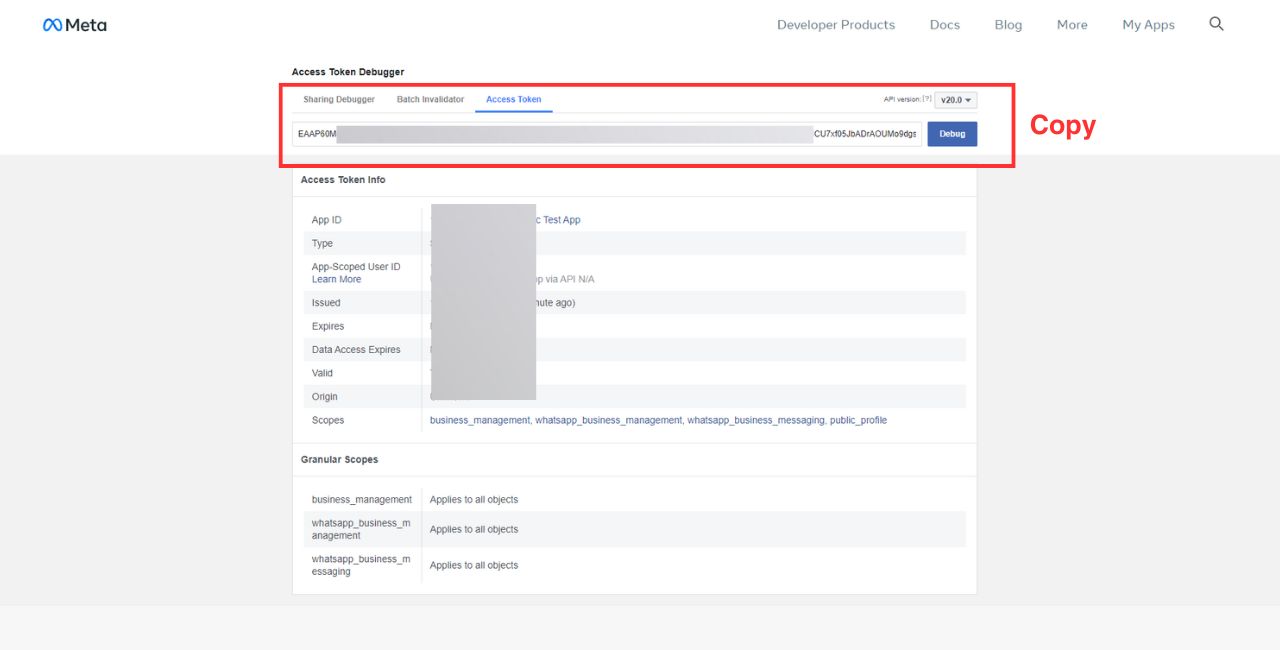
11. Paste the access token in Whatbuddy Access Token field and click Submit button.
You have successfully added your account. But you have almost done 80%. in next few steps will make it 100%
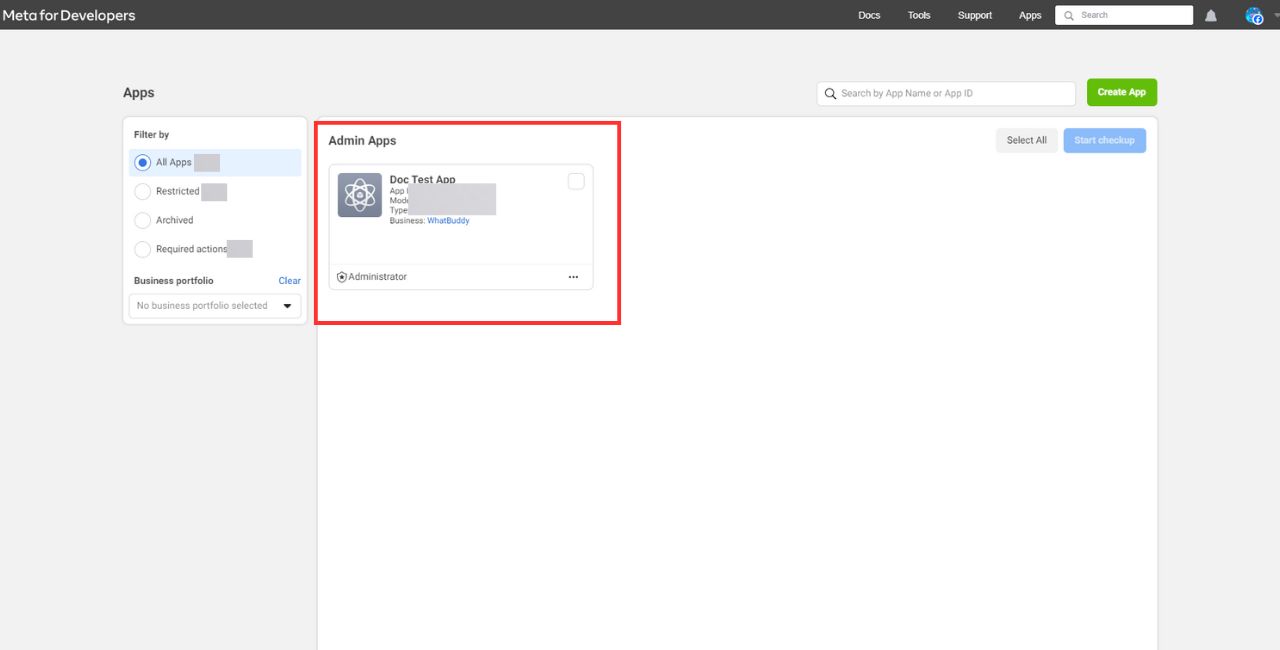
1. Go to https://developers.facebook.com/ . after login Click to My Apps

2. Instantly, a page will appear with All Apps created by you. Click on app, you want to configure webhook.
3. Next page will appear, in the sidebar inside the WhatsApp click on API Setup.
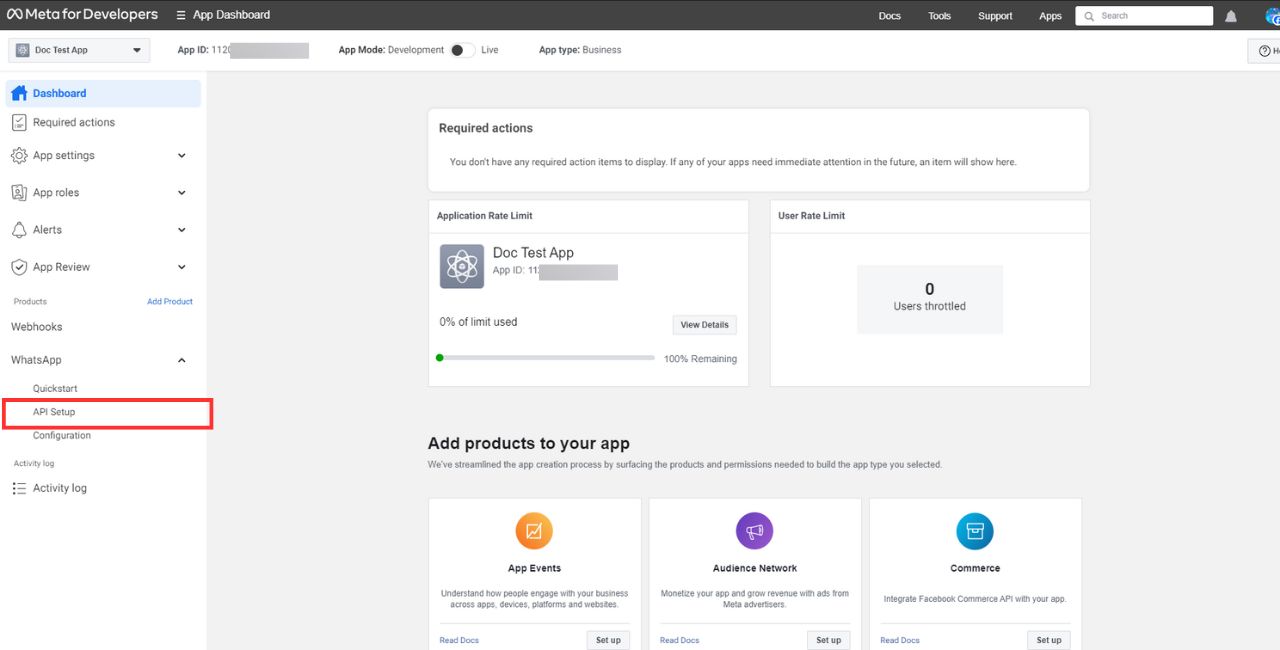
4. Now, you have to configure the webhook to receive messages. Scroll down, go to step 3 from the API setup and click on the Configure webhooks link.
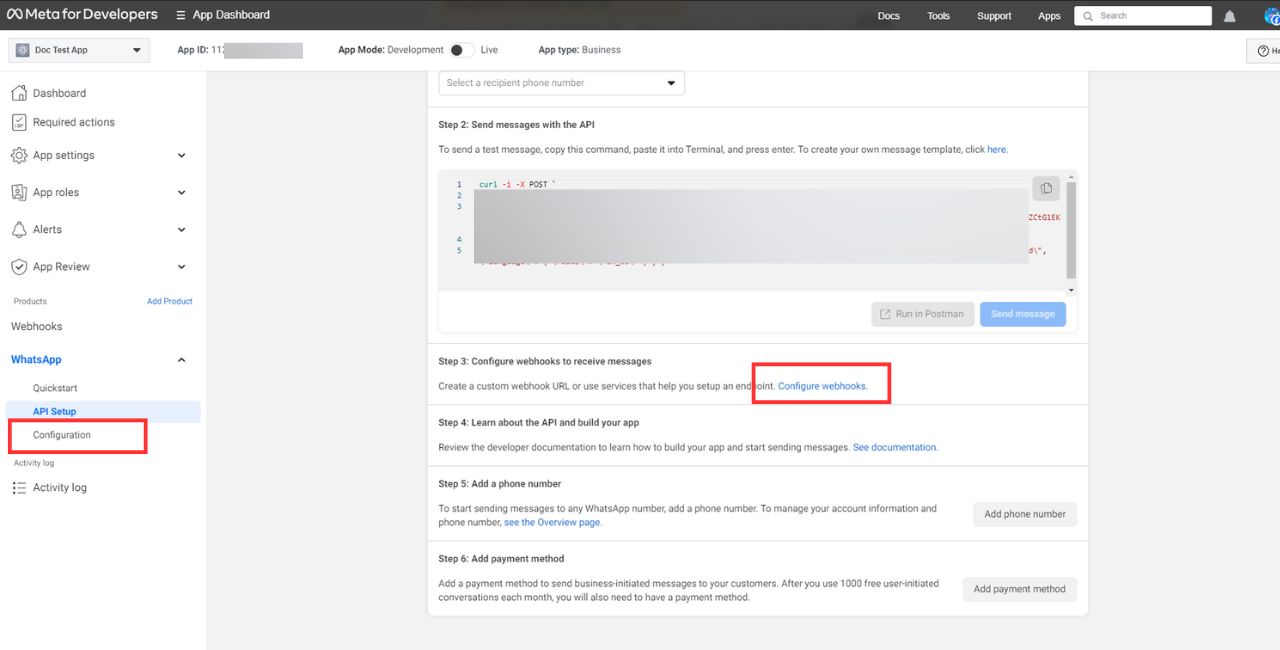
5. In the webhook section, you will see an edit button. click on the edit button. To fill the webhook's callback URL fields you have to visit WhatBuddy. Don't close this tab.

6. In WhatBuddy, on Whatsapp Account List page click on Update button
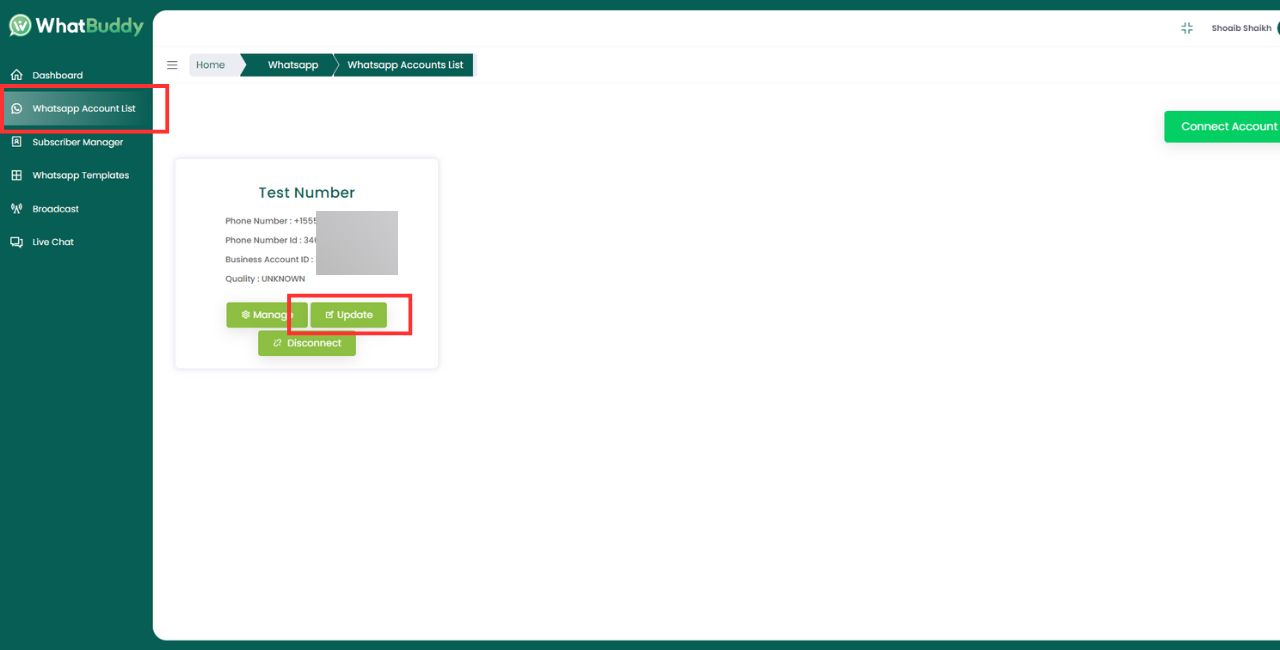
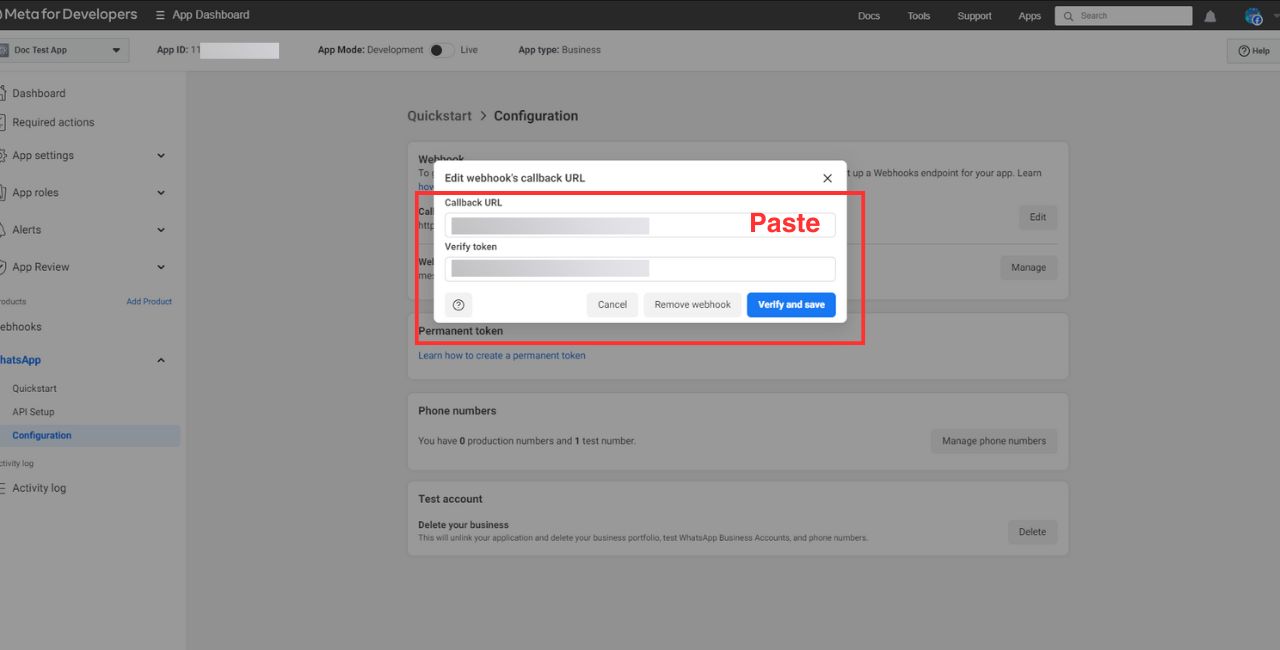
7. Copy Webhook Callback URL and Webhook Verify Token from here and_

8. Paste Webhook Callback URL and Verify Token In the webhook section (refer step no. 5 example). then click Verify and Save
9. Next, to select webhook fields, click on the Manage button.
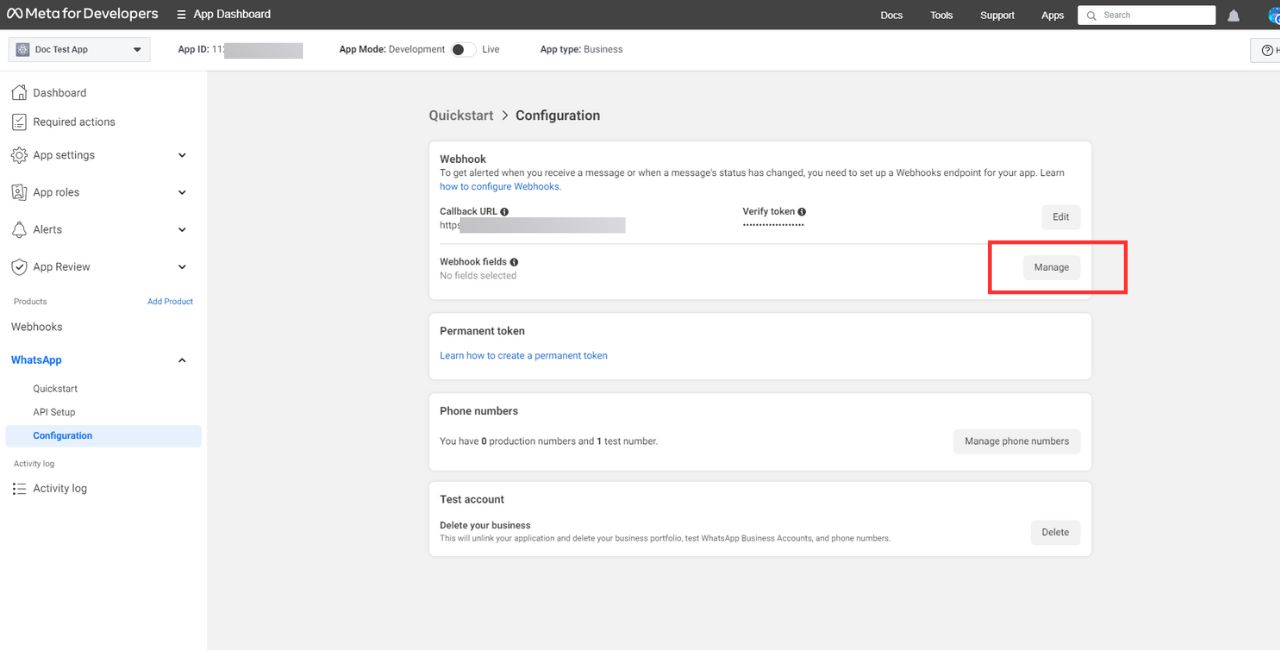
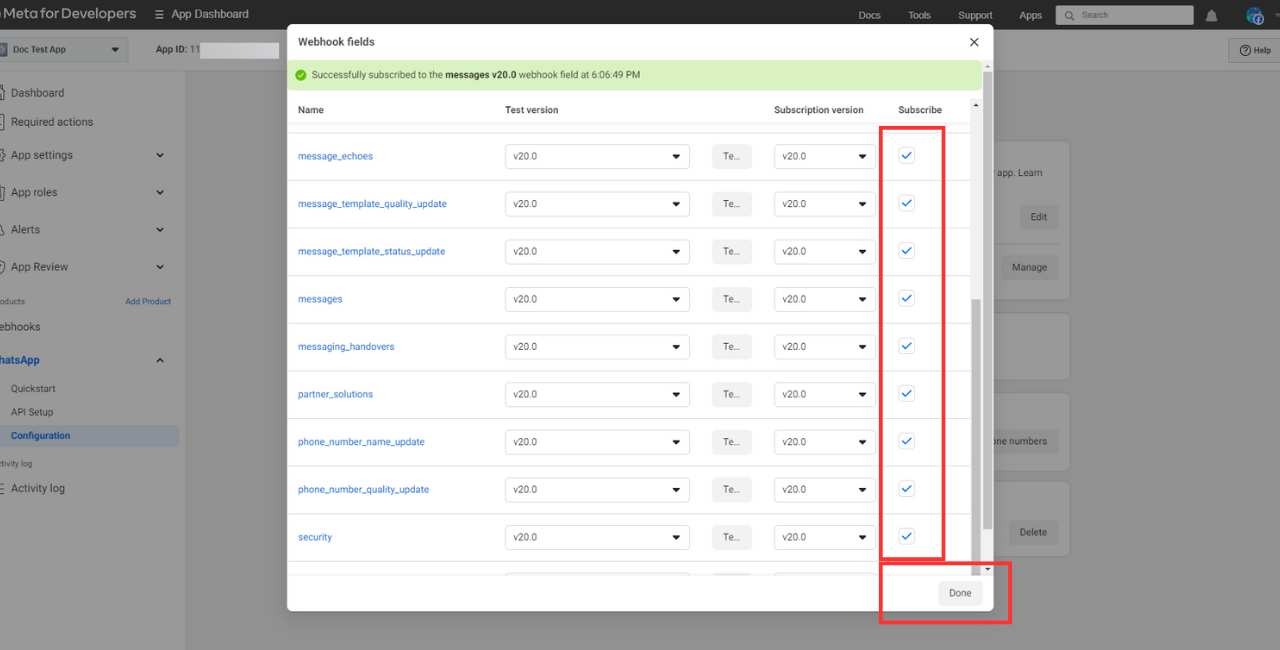
10. Now subscribe Message webhook field. Then click on the Done button.
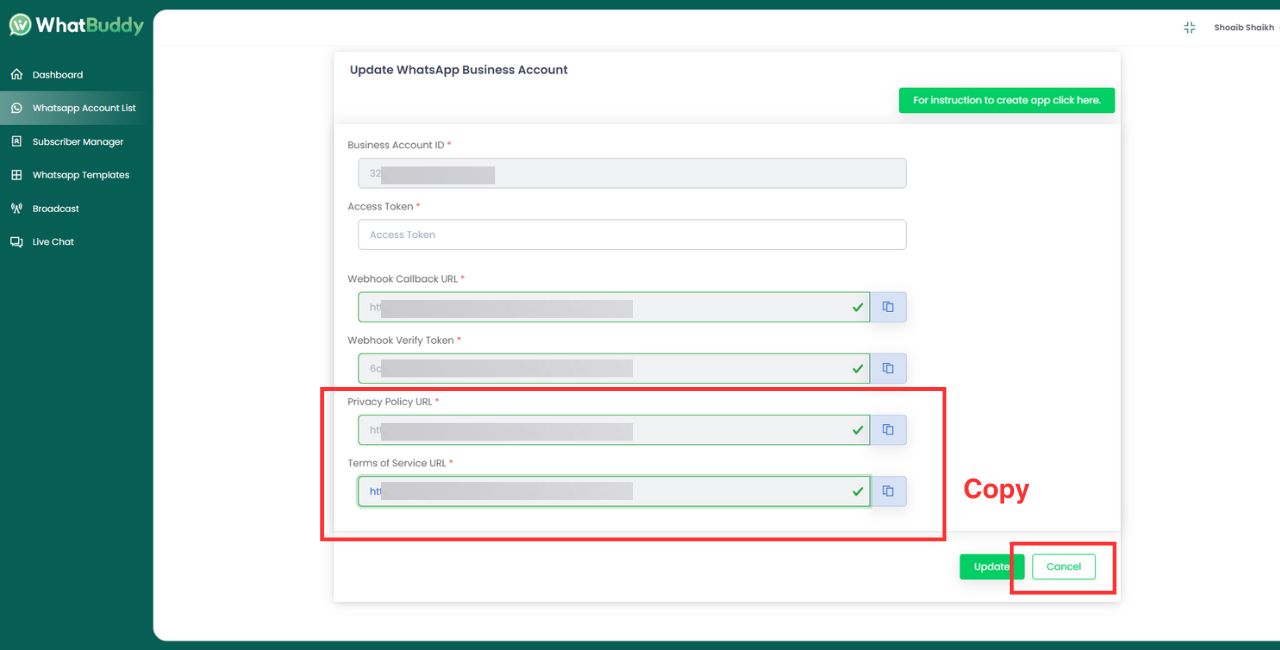
11. Visit on WhatBuddy, and copy remain URL's Privacy Policy URL and Terms of Service URL from here. after pasting in next step click Cancel button for this page.
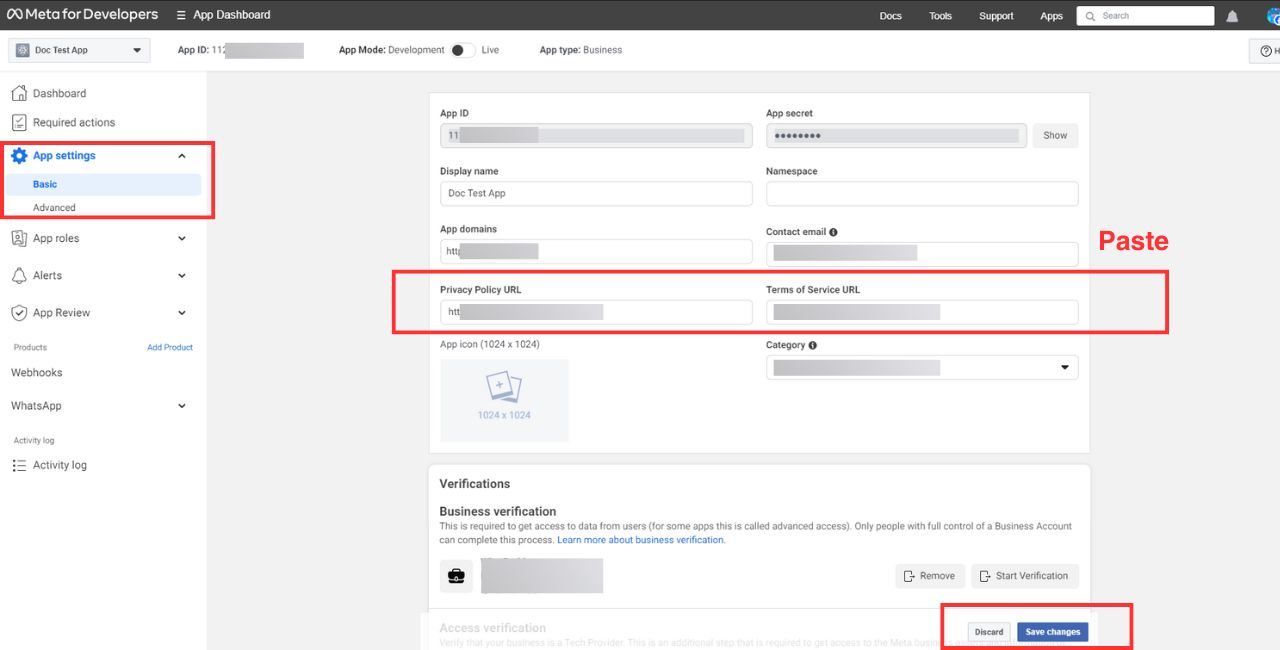
12. Then from the App settings, click on the Basic option and paste the Privacy Policy URL and Terms of Service URL. click save changes. Done
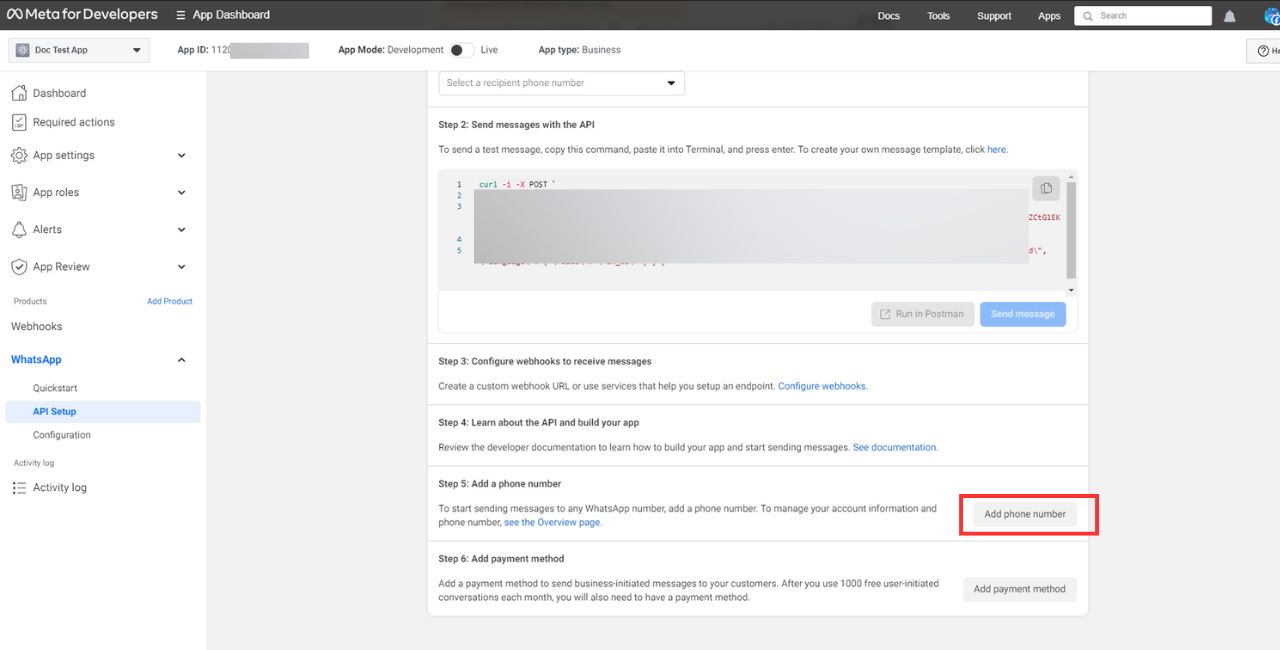
1. Check the sidebar and click API Setup button which is inside the WhatsApp dropdown. Scroll down on page and click on Add phone number button
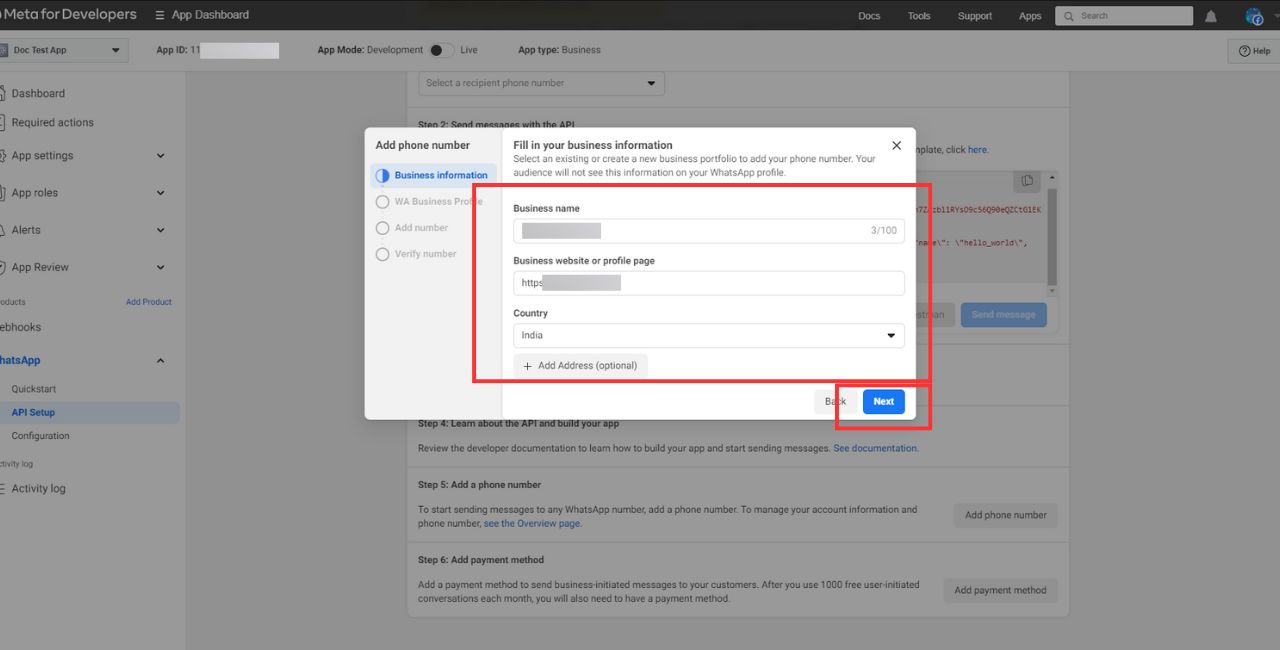
2. A modal form will appear. In the form, provide business information (select an existing or create a new) that will be not visible to people on WhatsApp. click Next
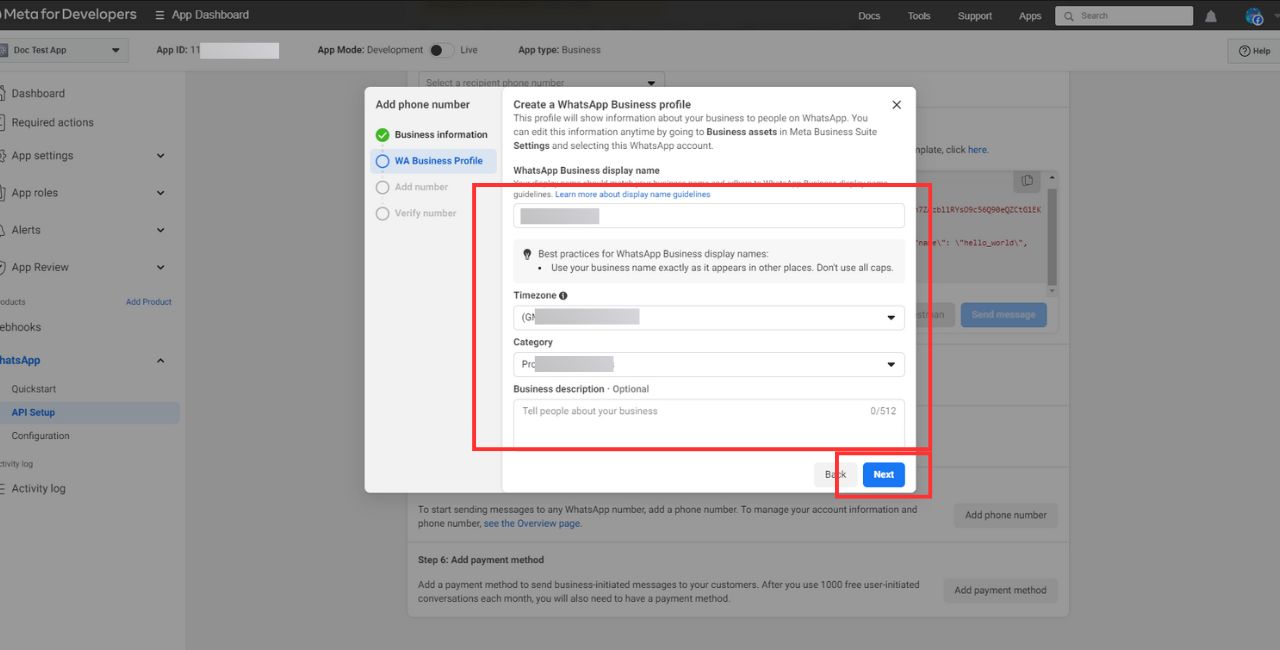
3. In the form, you must provide profile information that will be visible to people on WhatsApp. after filling it click next
4. In the Phone Number field, you have to provide phone number. then you have to choose how you would like to verify your phone number via text message or Phone call.

5. Then, you have to verify your phone number, and Done. You are ready to use.